Remodeling a bathroom can feel overwhelming, especially if you’ve never done one before. Knowing the correct order of work is what separates a smooth project from one filled with delays, extra costs, and rework. This step-by-step bathroom remodel guide breaks the entire process down into clear, manageable phases so you know exactly what to do—and when to do it. From early planning and permits to demolition, waterproofing, and final inspections, this guide will help first-time homeowners and DIYers complete a bathroom remodel the right way from start to finish.
Many of the tasks below will overlap with others. That’s why having something to take notes on is important. You’ll make pricing lists of items to purchase, keeping track of what’s been completed, and drawing diagrams. For this I recommend having a notebook and pencil handy at all times. Graph paper is a plus, but not necessary.
My Bathroom Remodel Assistant can walk you through the bathroom remodel process from start to finish. It is a downloadable PDF with the sections of the bathroom remodel in the order you will be working on them. You will be able to fill in the blanks as you go. This purchase helps me to create more content like this, and I greatly appreciate it.
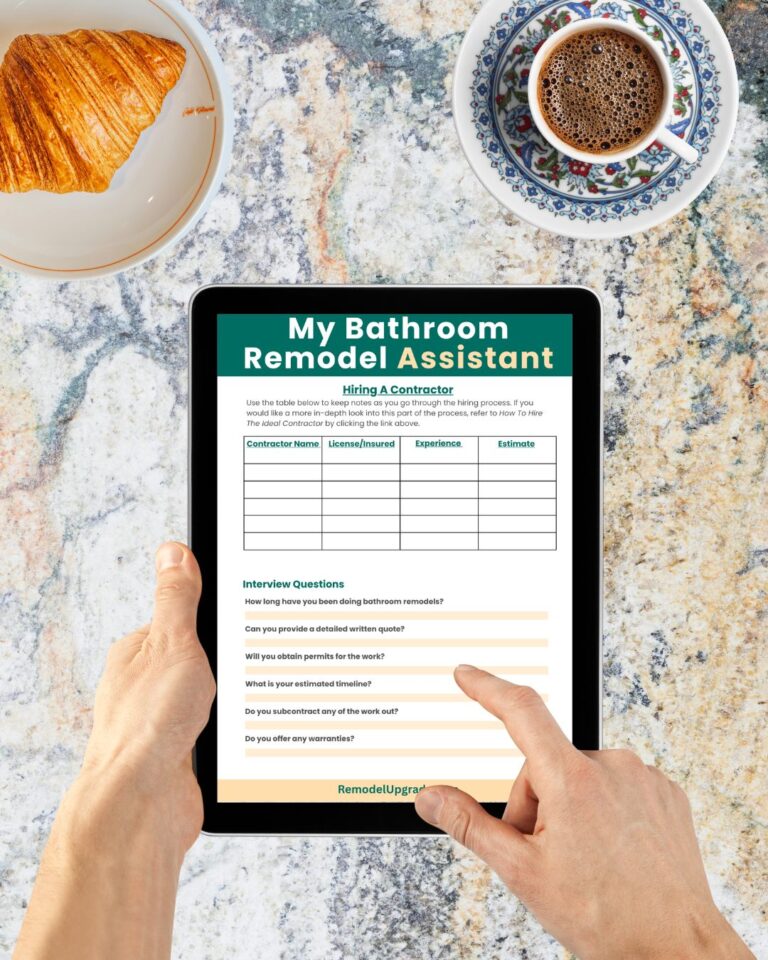
Take Control of Your Bathroom Remodel with the Bathroom Remodel Assistant PDF!
This easy-to-use, downloadable PDF guides you through every stage of your bathroom remodel. As you plan your project, simply fill in the blanks with your own details—no guesswork, no stress. Stay organized, confident, and on track from start to finish, making your remodel smoother, faster, and truly stress-free.
Fillable PDF lets you capture every project detail.
Stay on schedule with clear task tracking.
Follow a step-by-step system to hire the perfect contractor.
The Bathroom Remodel Assistant is the ultimate tool for first-time homeowners and seasoned renovators alike. Get your copy now and take the first step toward your dream bathroom!
Bathroom Remodel Order
A successful bathroom remodel depends on completing each phase in the correct sequence. Skipping steps or doing them out of order often leads to wasted materials, inspection issues, or having to redo finished work. This step-by-step bathroom remodel guide outlines the natural progression of a remodel so each task builds on the one before it.
Bathroom Remodel Steps at a Glance
Planning and budgeting
Measuring and layout decisions
Material and fixture selection
Permits and code requirements
Demolition preparation
Plumbing and electrical work
Framing, insulation, and drywall
Waterproofing wet areas
Tile and flooring installation
Fixture and cabinet installation
Inspections and final touch-ups
The process begins with the planning phase. This can be thought of as defining the purpose of the remodel, setting a realistic budget, and deciding which tasks will be handled personally and which may require licensed professionals. Accurate measurements and a finalized layout come next, allowing fixtures and materials to be selected before any work begins.
Once materials are chosen and permits are confirmed, the bathroom is prepared for demolition. Only the necessary components are removed to expose plumbing, wiring, and framing that are worked on. Structural repairs, plumbing updates, and electrical changes are completed before walls and floors are closed back up.
After rough work is finished, the space is rebuilt. Framing is repaired or modified, insulation is installed where needed, and moisture-resistant wall materials are added. Waterproofing follows, creating a protective barrier in showers, tub surrounds, and other wet areas before tile or flooring is installed.
The final stages focus on finishes and function. Flooring, tile, cabinetry, plumbing fixtures, and lighting are installed in sequence, allowing proper curing and fit. The remodel concludes with inspections, system testing, and minor touch-ups to ensure the bathroom is safe, code-compliant, and the work is finished.
Plan Your Remodel’s Goals, Budget, and Scope
Skill Level: Beginner
Timeline: 2–4 weeks
Required Tools: Notepad; Pencil
Required Materials: None
Estimated Cost: N/A
Pro Tip: Source and price every item before buying. Check lead times to make sure they fit into your schedule.
The planning phase in a home remodel is possibly the most important step in the process. You don’t want to overlook this step as it will help you navigate through all future steps more easily.
Here is where you can have a clear understanding of what’s taking place from demolition all the way to finish work. A realistic look will help with knowing things like what your budget is, what work will be done, and much more.
One aspect of this is figuring out your “must-haves” and your “nice-to-haves”. Must-haves are items you can’t live without. A nice-to-have is something you’d be okay with changing to something else if necessary. It’s good to have a notepad and pencil with you for this part of the process so you can look back at these items in later steps.
Are you interested in a cosmetic update of your bathroom, or is a full remodel in order? Many times a room can have a completely different feel without needing a lot of work. A full remodel requires more phases before completion. This type of remodel will therefore need a larger budget.
Set your budget accurately to make sure you don’t run into any surprises. This step can be a real eye opener at times. There’s a chance the budget might force you into turning some of your must-haves into nice-to-haves. Take a look at the article called How To Plan A Remodel On A Budget for an in-depth look at this phase.
Measure the Space and Finalize the Layout
Take a measurement of the perimeter of your bathroom. It will help if you have another person to help you with this stage. Holding the tape measure accurately on one wall as you read the measurement on the other wall can be difficult to do alone. It’s important to have accurate measurements because you may need to purchase an item like a vanity that requires knowing what size the opening is going in.
After you get a basic outline of the room, you can draw in the toilet, sink and bathtub/shower. These will show you where the plumbing is located. Take a look under your sink for the location of the pipes before purchasing a new vanity. Pick a design that doesn’t have the plumbing in the way of parts of the vanity like the drawers.
It’s difficult to move the plumbing if that is something you want to do in this remodel. Depending on your skill level this may not be something you should attempt. There’s a good chance you need a permit, depending on your county’s requirements. Consult a licensed plumber if you’re interested in moving any plumbing. Take a look at How To Hire The Ideal Contractor for a guide on this process.
Choose Materials, Fixtures, and Finishes
Choosing the materials you will be using is a fun part of the process. This is where you get to be creative in your choice of colors, finishes, and more. The main categories to write down in your notepad are: Flooring, vanity, tub and shower, backsplash, lighting, and wall color. Make note of things like the type of finish you want to have on your fixtures.
The most common choices are chrome, brushed nickel, polished nickel, oil-rubbed bronze, matte black, satin brass, polished brass, copper, and pewter. Keep in mind that not every faucet, light fixture, or shower door for instance is available in all of these options. It’s nice to get the fixtures to match, but it’s okay to mix them as well. Try to use 1-2 finishes in your design to give a sense of uniformity.
As you are researching the items to use, write down the specific products that should be included in your design. Keep in mind some of the items will have a lead time, requiring a waiting period before they arrive. Also the brass and copper options are the most expensive choices of finishes. Keep this in mind as you choose the products you will be using.
At this point you look for where the materials you want are located, and start purchasing them. The list you made on your notepad in the previous step will give you all the information for you to do this quickly.
Check Permits and Local Requirements
Skill Level: Beginner
Timeline: 1–4 weeks
Required Tools: Internet access; Telephone; Notepad; Pencil
Required Materials: N/A
Estimated Cost: N/A
Pro Tip: Call or check the local building department’s website yourself and ask which permits are required for your exact scope of work. Don’t simply rely on a contractor’s word.
This step may not be completely necessary for your project. If you are using a contractor this can be something they do instead. A quick search online will help to get the contact email or phone number for your location’s permit office. There may be a form you need to fill out for the inspector to get an understanding of the scope of work being done.
Plumbing changes
- Moving or adding sinks, toilets, tubs, or showers
- Relocating drains or water supply lines
- Installing or modifying a gas water heater
Electrical work
- Adding new outlets or circuits
- GFCI outlets installation
- Recessed or ceiling lights, especially near water sources
Structural changes
- Removing or moving walls (load-bearing or non-load-bearing)
- Adding windows or enlarging door openings
Ventilation
- Installing or relocating exhaust fans
- Changing venting to exterior
Tile or floor modifications affecting plumbing (sometimes)
- Especially if it affects waterproofing or subfloor replacement
Waterproofing and shower pans (in some areas)
- Certain municipalities require inspection for wet-area waterproofing
Major fixture replacements (sometimes)
- Some cities require permits for replacing tubs or toilets if plumbing layout changes
Hire a Contractor or DIY The Work

Will you be doing all the work on your project yourself? This can mean your timeline will be extended because you are not working on this full time. It’s okay to do work that requires you to learn new skills, as this is the best way to improve. But don’t bite off more than you can chew. There are some items that should be left to a professional, especially if you don’t have a huge skill set in this type of work yet.
The areas to choose a contractor for are the things that require permits. Also anything that includes major changes to the home’s structure. That means if you will be opening walls to expose studs you might want a contractor. Moving plumbing or electrical should only be done by someone who has done that type of work before and knows the codes as well as safe work practices.
If you are interested in hiring a contractor but don’t know where to begin with the process, take a look at How To Hire The Ideal Contractor. This article takes an in-depth look at the process of finding, interviewing, and building a contract with your ideal contractor. Don’t deal with someone who doesn’t have your best interest in mind.
Prepare the Bathroom for Demolition

You now know the extent of work that will be done, and you have a good idea of what materials to use. You’ve started purchasing some of the materials you wrote down in the planning phase. It’s important to get the materials you will be using before starting demolition. This phase isn’t going to take long, and you will be ready to begin installations in no time.
There is a little preparation work that needs to be done. Make sure the areas in your house that aren’t being worked on are protected from dust and from being damaged. You will be carrying tools into the bathroom and old materials out of it. Lay down moving blankets or tarps on things like furniture in high traffic areas that might come in contact with sharp or dirty objects. Cover other furniture that is likely to have dust settle on it.
Most of the time the discarded materials can be put in your municipal garbage can if there’s not much of it. If it’s more than what you can fit in one week you may want to make a pile and put as much as possible in each week. If it’s a large demolition you might need to rent a dumpster. Contact your garbage company to have them drop off and plan a pickup date.
You need to know where the water valve to the house is if you’ll be working on plumbing. If you don’t know where your water main is, take a look around the curb along your property for a box that’s flush with the ground. Only the lid will be visible on the ground. Lift this lid to access the main water line going into your house.
Like the water main, you also will need to turn off electricity to this room if you plan on changing the lights, updating electrical outlets, or anything else. Make sure you know where your home’s breaker box is, and how to turn off the correct breaker before the work gets done. When the power is off to this room, the lights will not work. For this reason you want an extension cord and worklight to use.
Bathroom Remodel Demolition Phase
Skill Level: Beginner
Timeline: 2-5 days
Required Tools: Safety glasses; Work gloves; Dust mask or respirator; Pry bar; Hammer; Utility knife; Worklight; Extension cord; Multi-bit screwdriver; Adjustable wrench; Contractor trash bags; Bucket or heavy-duty tote
Required Materials: N/A
Estimated Cost: $150–$300
Pro Tip: Take pictures of the areas you are working on as they get demolished. These reference photos are incredibly helpful during rebuilding to show key details like plumbing locations, wiring paths, and stud spacing.
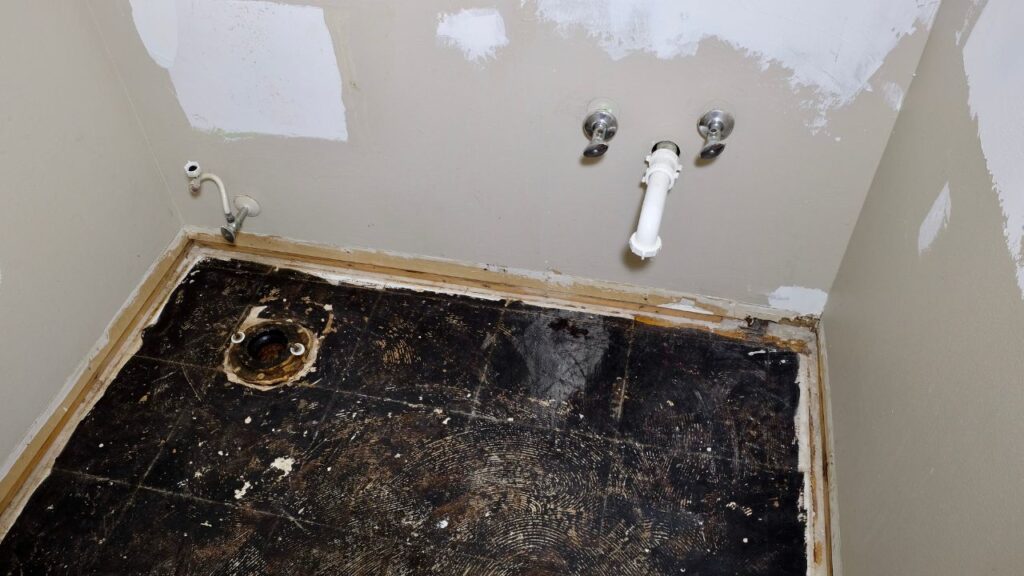
During the demolition phase, it’s important to only remove what needs to be removed. Try not to damage any of the materials that will stay in place. If you are opening the walls it’s important to know where the electrical and plumbing are located so you don’t damage them. If you don’t know for sure if either of these are behind a wall you are opening, go about it expecting there is a live wire or pipe.
The quick and easy way to tell where there might be wires is if there is an outlet, or switch, there will be a wire on this stud. You don’t know if the wire turns and runs horizontally at a specific location or if it goes up or down along the stud.
Pro Tip: any time there is an electrical box that houses a switch, or outlet, there will be a stud on either the left or right side of the box. Take the plate cover off to see if you can tell which side the box is attached to. Once you know where the stud is, measure from the center of that stud 16 inches in either direction to find the center of the next stud. Some houses have 24 inches on-center studs.
I like using the Franklin Sensor Stud Finder with live wire detector capability. It finds the studs, and also tells you if there is a live wire running along the side of this stud. The studs that don’t have a live wire will not show an electricity indicator.
As you work it’s good to sweep the floor to remove the dust and debris. Use contractor grade garbage bags to contain the debris and take it out of the work zone. Also if you have a shop vacuum it’s good to clean up the floors before the dust gets tracked into the house.
Framing, Insulation, and Drywall
Skill Level: Intermediate
Timeline: 1-2 weeks
Required Tools: Tape measure; Level; Pencil; Utility knife; Drill/driver; Circular saw or hand saw; Hammer; Stud finder; Drywall saw; Taping knife; Sanding block
Required Materials: Lumber; Screws or nails; Insulation; Vapor barrier (if required by code); Drywall sheets; Drywall screws; Joint tape; Joint compound; Corner bead
Estimated Cost: $300–$800
Pro Tip: Measure twice, cut once. Always check that your studs are level and plumb before installing drywall.
There are specific guidelines that need to be met when framing walls. It also takes some specific tools like a framing nail gun and an air compressor. If you don’t have access to these tools, you can do the same work with nails and a hammer. Make sure to use the right size nails for the job. It’s possible to use screws instead of nails, but nails are stronger and they flex instead of snap with movement of the wall.
If walls are being repaired or moved in your remodel you may need to get them inspected before moving to the next step. This will let the city know all the work being done in your home is safe and up to proper standards. It may take some time to get the inspector out there depending on their schedule.
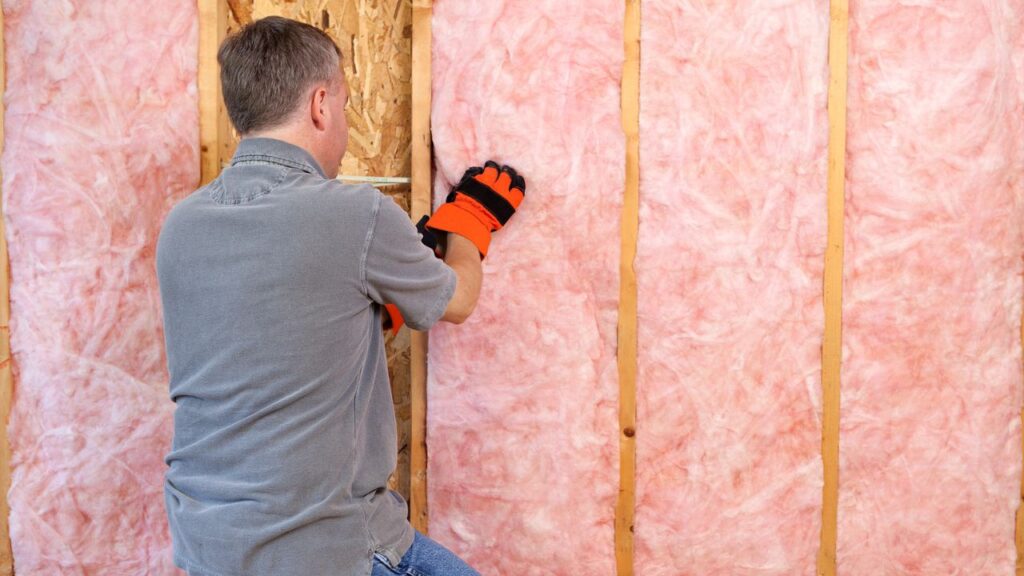
Once this step is complete you will be able to cover the wall with drywall. If it’s an exterior wall there should be insulation put in before covering it. Also if it’s a wall shared with a bedroom it might be smart to put some insulation as sound proofing in if it’s in your budget. This step is not necessary, but is a nice addition when possible.
If you are drywalling where a shower or bathtub will go you need to use a special type of drywall. It’s moisture and mildew resistant. Hardy Backer is a product used when tile is going to be installed.
Plumbing and Electrical Rough-Ins
There are some cases where you will need to do plumbing work that is not out of your league. I installed a new shower fixture, which came with a new valve. I was able to get the right attachments needed to properly attach the valve to the existing plumbing.
Make sure you have all the tools you need before getting started with this step. It’s not a good situation when you have the water turned off and need to go to the store to buy one more tool. For a complete list of the bathroom tools you will use, take a look at the Bathroom Remodel Tool Checklist article.
Any outlet that is in the bathroom should be a GFCI outlet. This will prevent any problems with having too much moisture on the outlet. Take a look at your local building codes for a better understanding of what your area requires.
Waterproofing the Shower and Other Wet Areas
Skill Level: Intermediate
Timeline: 3-7 days
Required Tools: Paintbrush or roller; Putty knife; Measuring tape; Utility knife; Small bucket or mixing container; Gloves; Safety glasses
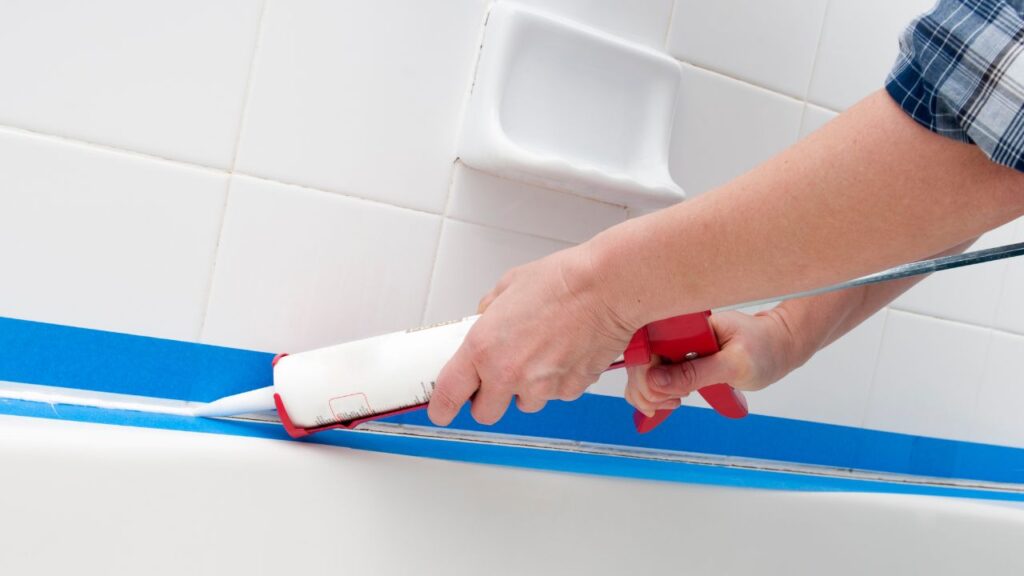
Required Materials: Waterproofing membrane; Painter’s tape; Seam tape; Caulk
Estimated Cost: $150-$700
Pro Tip: Before applying any waterproofing, seal all seams, corners, and joints first. Always follow the manufacturer’s instructions for coverage and drying time between coats.
The areas that will come in contact with water on a regular basis should be waterproof. This keeps materials that are susceptible from being damaged. If it’s not done properly it can leave problem areas that can eventually go bad. Below is a list of some of the most important areas to waterproof in a bathroom.
- Shower walls
- Shower floor
- Tub surround
- Corners and seams
- Shower Niches and benches
- Floor around the shower or tub (especially in small bathrooms)
There are several options for you to use in the waterproofing process. Oftentimes the surface you apply to the drywall or subfloor will be the waterproofing layer. For instance tile and grout in a shower is not enough of a waterproof layer. You will need to pick a type of waterproof sublayer to apply correctly below the tile.
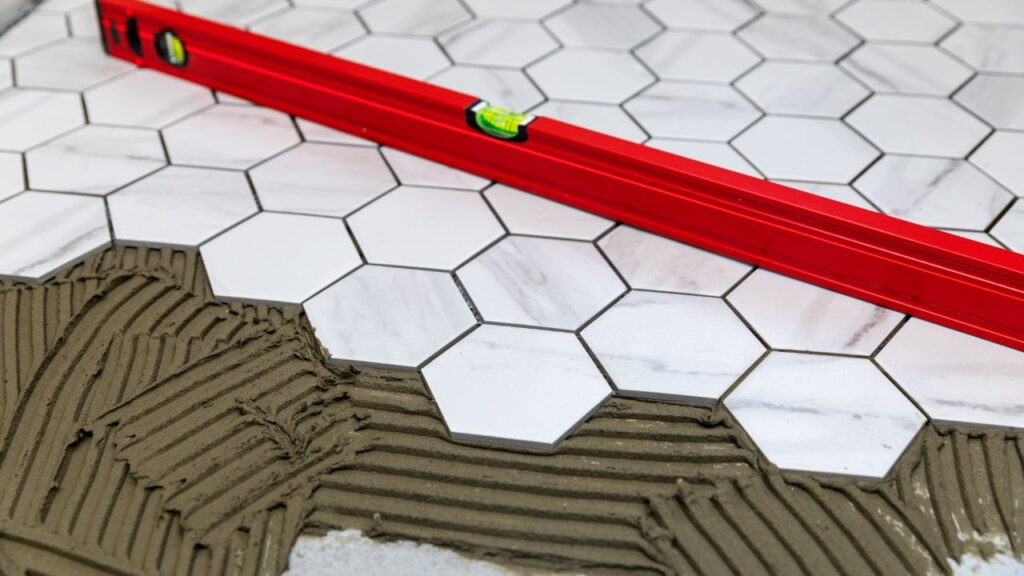
Install Tile and/or Flooring
Skill Level: Beginner to intermediate
Timeline: 1-2 weeks
Required Tools: Tape measure; Felt tip marker; Level; Rubber mallet or tapping block; Utility knife; Notched trowel; Grout float; Sponge and bucket; Tile cutter
Required Materials: Tiles or flooring planks; Thin-set mortar; Grout; Tile spacers; Backer board if needed; Waterproof membrane; Caulk; Transition strips
Estimated Cost: $150-$700
Pro Tip: Use a leveling system or spacers consistently. Uneven tiles or gaps are the most common DIY mistakes and can ruin the look of a floor.
Now that the waterproof layer is in place it’s time to move forward with the walls and floors. Make sure you have all the tools and materials on site before getting started with this stage. There are aspects that may be time sensitive, so you will want to be prepared.
Below is the order to install tile in a bathroom:
- Waterproofing
- Shower floor tile
- Shower wall tile
- Niches and benches
- Bathroom floor tile
- Grouting
- Caulking
Some of the stages of tiling require a dry time. For instance you want to make sure the tile has fully cured before you apply the grout. When tiling a floor do not walk on the tile until it has fully dried. The dry times will be listed on the packaging of the material you use.
Flooring Installation Tips
- Choose flooring specifically rated for bathrooms
- Read the manufacturer instructions before starting
- Make sure the subfloor is clean, dry, and flat
- Fix squeaks or loose subfloor panels first
- Dry-fit a few rows to check layout and spacing
- Start from a straight reference line, not the wall
- Leave expansion gaps around all edges
- Take your time cutting around doorways
- Remove toilet before installing flooring
- Consider flooring thickness when buying toilet wax ring
- Clean excess adhesive or mortar as you go
- Let the floor fully cure before walking on it or installing fixtures
Install Vanity, Toilet and Fixtures
Skill Level: Beginner to intermediate
Timeline: 3-7 days
Required Tools: Tape measure; Level; Adjustable wrench; Screwdrivers; Drill/driver with bits; Putty knife; Caulk gun; Plumber’s tape; Bucket or small container; Utility knife
Required Materials: Vanity cabinet; Vanity countertop; Sink; Faucet; Toilet; Wax ring; Water supply lines; Drain assembly / P-trap; Caulk; Plumber’s putty; Screws
Estimated Cost: $350 – $1,200+
Pro Tip: When installing a vanity or toilet, always dry-fit all parts first before applying caulk or tightening connections.
Installing a vanity is not as hard as it seems. The trickiest part is cutting the holes for the plumbing to go through. If you want to save some time, and don’t mind how it looks, you can cut a larger rectangle shape with a jigsaw in the location where the pipes will go. Just drill a hole in opposite corners of the rectangle that’s wide enough for the jigsaw blade to fit through.
Installing the vanity is like installing any other cabinets. You want to have at least four screws that are attached to studs. More screws if the vanity is a long one. I like to put two screws in each stud, one at the inside top of the cabinet, and one at the bottom.
Installing the toilet is not difficult. Once you remove the old toilet you must clean the old wax from the flange in the floor. Make sure you get all the old debris from the wax ring out. Some rings come with a plastic funnel that fits into the flange. This can be difficult to see because it’s the same color as the flange. This piece must be removed as well. Use a putty knife or other flat tool to do this portion without gouging the abs pipe.
Lighting is not difficult to install if you know how. It’s okay to find an electrician to do this if you don’t feel comfortable. Electricity is a dangerous thing to work with and should be treated with respect. Don’t cut any corners with electrical work. Also make sure you have the right tools and equipment for the job ahead of time.
Final Inspections and Touch Up
Skill Level: Beginner
Timeline: 3-7 days
Required Tools: Notebook; Pencil; Blue painter’s tape
Required Materials: N/A
Estimated Cost: $0 – $500+
Pro Tip: Walk through with your notepad and a roll of painters tape in hand. Put pieces of painters tape near any damaged materials or other issues. At the same time make a note in your final checklist.
If you have to get permits for your job, they must be inspected. Contact the office to tell them your job is completed. Sometimes a job is large enough that the permit officer will need to visit multiple times throughout. They will let you know the stages of inspection once you have contacted them.
To test plumbing you want to turn the water back on and check for leaks. This is easiest to do before areas like the wall or floor that was opened to do the work gets closed up. Once you have no leaks then you are ready to move forward.
Once everything is installed correctly and safely you can finish up the project by touching up the mistakes. For dings and damage to wood like the vanity and moulding you can use color wax to fill in the gouge. Then touch it up with paint if necessary.
Common Bathroom Remodel Mistakes
Skipping permits can cause some really bad problems further down the road. If the permit office notices your permit has not been met, they can tell you to demo your work for them to check an area they need to see. If they don’t find out about it, but you end up trying to sell your house the work will be flagged as “non permitted work”. This can make selling your home more difficult.
Another mistake that’s easy to make is not having the materials on site when needed. This can push back your timeline, and make things difficult if the contractor is there to do the work but you don’t have everything yet. There can be a lag time between when you order materials and when they show up to the store. Keep this in mind and try to have everything ready when necessary.
Timelines are hard to visualize for someone who hasn’t been doing this type of work very long. It’s safe to say that you will likely need extra time added on if you work a fulltime job, are new to these types of projects, and are learning new skills as you go.
Frequently Asked Questions
How long does a bathroom remodel usually take?
The timeline depends on the size of the bathroom, complexity of the project, and whether you hire a contractor or do it yourself. On average, a full remodel takes 2–6 weeks, including planning, demolition, installation, and finishing touches.
Do I need a permit to remodel my bathroom?
Most bathroom remodels require permits for plumbing, electrical, or structural changes. Even small updates, like moving plumbing lines or installing new wiring, can have permit requirements. Always check with your local building department before starting work.
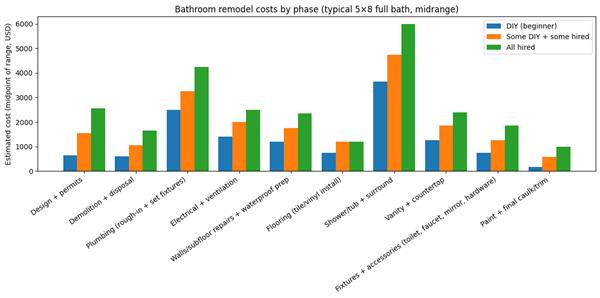
What is the most expensive part of a bathroom remodel?
Materials like tile, vanity cabinets, countertops, and high-end plumbing fixtures typically make up the largest portion of the budget. Labor costs can also be significant if hiring professionals for plumbing, electrical, or tile work.
Can I do a bathroom remodel myself?
Yes, many homeowners complete parts of the remodel themselves, especially demolition, painting, and installing fixtures. Tasks involving plumbing, electrical work, or structural modifications should be done by licensed professionals unless you have experience.
How can I avoid common mistakes in a bathroom remodel?
Planning carefully, measuring accurately, ordering materials in advance, and following a step-by-step sequence are key. Skipping permits, rushing demolition, or starting tiling before waterproofing are frequent mistakes that can be costly to fix.
Conclusion
If you are someone who works well with your hands, and is interested in learning new skills then a bathroom remodel is something you can do yourself. Get all your tools together beforehand because it’s not a good thing to be running to the store in the middle of a task and the water or power is shut off to your house. Be patient with the process and focus on the task at hand. It’s easy to get distracted and move on before anything productive gets done.
Thank you for reading this article at Remodel Upgrade. Here we are dedicated to helping you turn your home into your sanctuary. Please let me know in the comment section below if there is anything you want to know more about in home remodeling. I look forward to hearing from you!
You got this,
Kevin

Kevin
I grew up in a family where my dad and several uncles were general contractors. They took me to the jobsites, and also taught me so much about home maintenance. I remember spending several summers in high school helping my father build houses. It gave me so much knowledge that I am excited to share!