A great kitchen remodel design is one that truly stands out. It’s a cohesive look that makes you excited to entertain friends, and cook with your family. Having a kitchen like this is much easier than you think. Follow the kitchen design rules below to elevate your kitchen to a brand new level.
There are many choices to make in a kitchen remodel. This part alone can feel like an overwhelming task that many people don’t want to begin. The trick is to take this project one step at a time, allowing yourself to not get overwhelmed by the scope of it all. This article will guide you through your kitchen remodel, keeping you on track and not wasting your time and money.
Some remodels require us to bring a professional on the job. It’s way too easy to hire someone who makes the project a nightmare. For that reason I wrote an article that will guide you through the process of Hiring A Contractor. Click the link to check out the best process of finding, interviewing, and hiring a contractor.
Table of Contents
ToggleHiring The Ideal Contractor Checklist
- Find out what needs to be done before hiring
- Learn where to go to look for the right people
- Get to know what goes into the interviewing
- What takes place before signing the contract
- Keep up-to-date while the project is happening
How To Design A Kitchen
It takes a little work for a kitchen design to be great. There are a few stages that are required to find success. Consider what will make your kitchen functional and beautiful at the same time. It’s the age-old concept of function meeting fashion. You don’t need to compromise on one or the other. There’s a method that can bring both when it’s all finished.
Stage 1: Designing With Your Current Kitchen Layout In Mind
Question: Are there any current choke points that can make things more difficult?
A choke point is a location in the kitchen where it can seem crowded at times. This can happen for multiple reasons like the shape makes it difficult to work with others in the area. It could also be because too many of the commonly used utensils are stored in one location. Take a look at what‘s causing this to happen so you can find a solution when you design the new kitchen.
A kitchen choke point happens when a location is used more frequently than others. Highly used utensils are stored together. When multiple family members are working at the same time they may be crossing pass at the choke point locations. One of the main culprits to this is the design of the cabinets and the way items get stored in them.
Feeling uncomfortable with a kitchen design can have one of several reasons. To help understand what you don’t like about your kitchen, write down what you want to change when you think of it. Writing it down will help you key in on specific issues that need attention.
When more space in your kitchen is utilized, the experience begins to be more enjoyable. Working in the kitchen alongside family and friends doesn’t need to be a negative experience.
There is a process for designing your kitchen that helps take it to a level that is much better than what you have now. Let’s look at some of the “rules” that can help you get there.
Go With the Current (Kitchen Design), Not Against It
When going about such a large task as a kitchen remodel, it’s important to not create more resistance than necessary. Simply speaking, you don’t want to make more work for yourself than you should.
There are some important features in your current kitchen layout that should be taken advantage of. Let’s look at each of these to get a clear understanding of what you want to keep.
The Current Kitchen Layout
The kitchen layout basically refers to the shape of the countertops. There are several common layouts that yours probably fits into. It could be a combination of more than one of these listed below.
U-Shaped Kitchen Layout
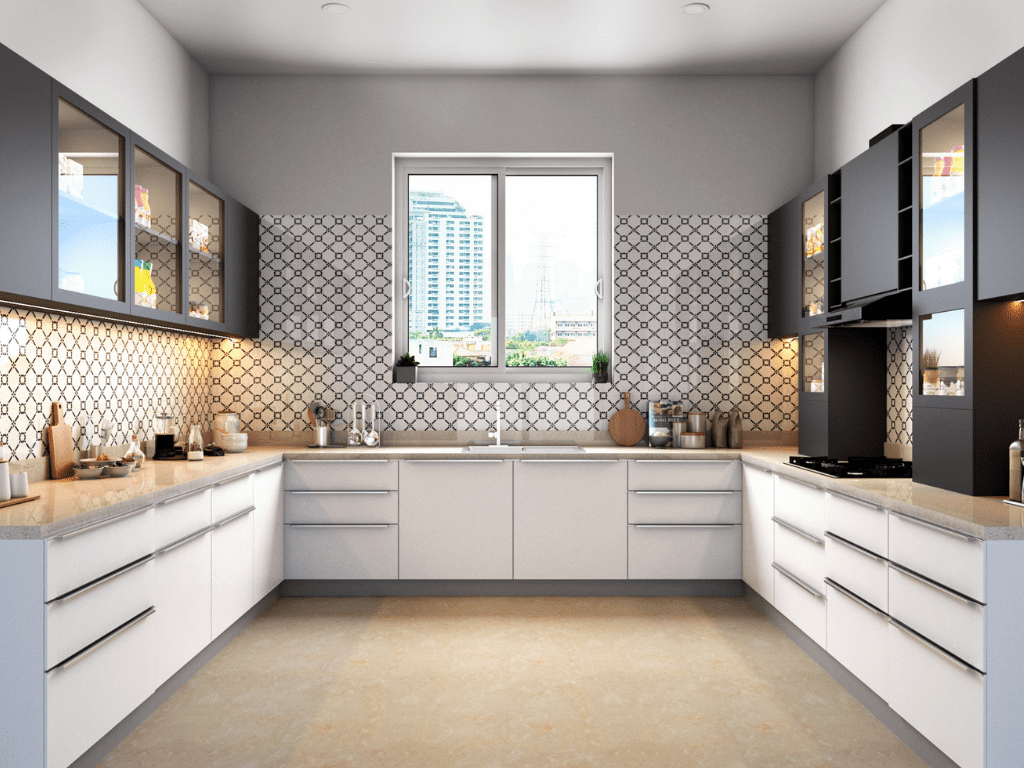
A u-shape kitchen incorporates three walls. The countertops run along all three walls forming the shape of a “U”. This is one of the more desired kitchen layouts by homeowners because of its ease of use. It can be comfortable working alongside other people. There is at least one variation of this layout when it is designed with the L-Shape and Peninsula kitchen.
L-Shape Kitchen Layout
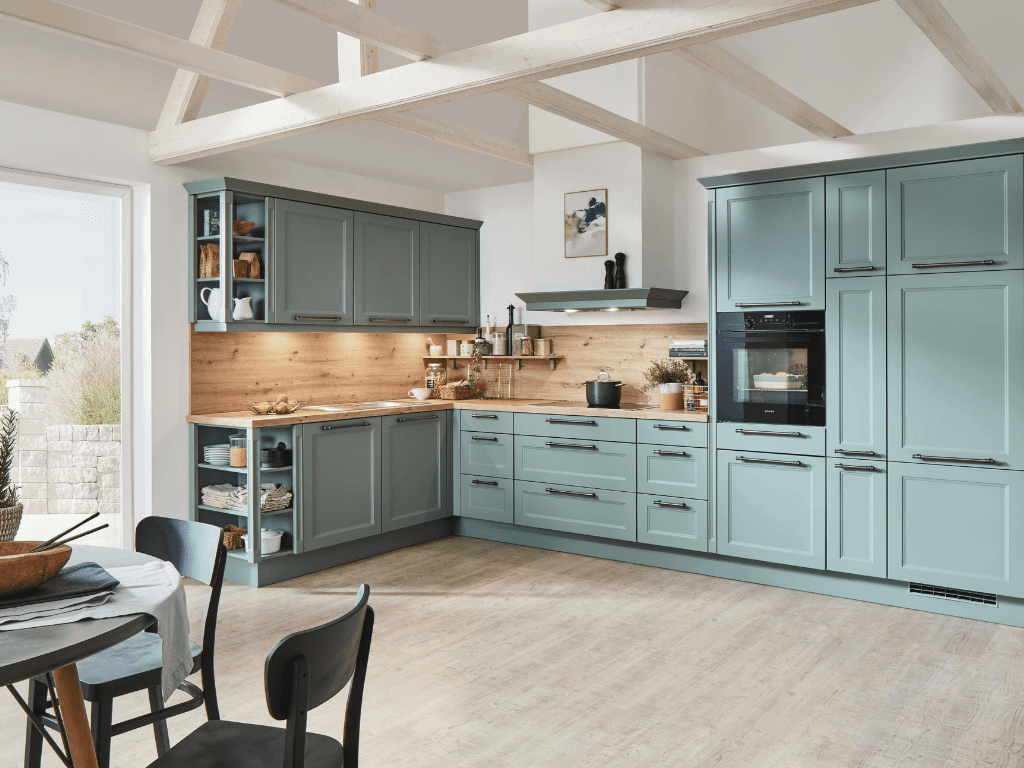
The l-shape floor plan is common in many homes. The countertop forms the shape of an L, which can make it easier to access items you are working with frequently. There are also several variations of this layout. Sometimes the cabinets are on two walls making room for upper and lower cabinets throughout. Other L-Shape kitchens have a peninsula to make this layout.
Peninsula Kitchen Layout
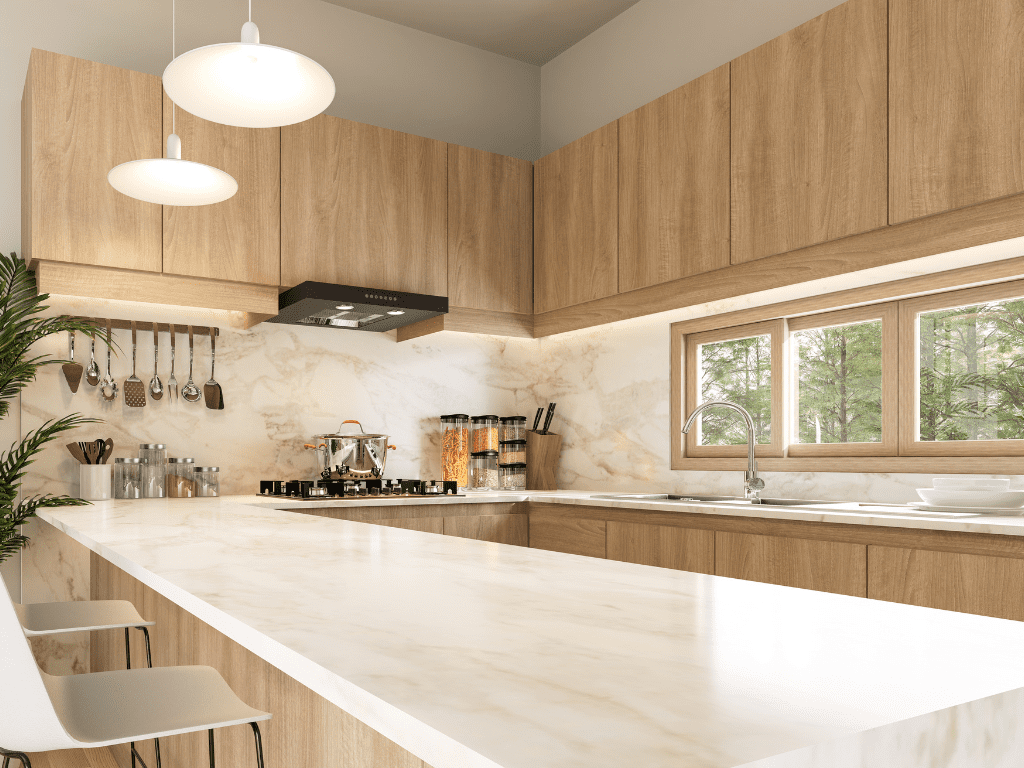
A peninsula in a kitchen is what refers to a protrusion of cabinets coming off a wall. The main benefit of this design is it allows for an “open concept” floor plan. It usually is included in combination with other layout patterns. The peninsula is a distinctive divider of the kitchen space and another living space in the home. This layout design is best used in a home with a large space that includes the kitchen in it.
Island Kitchen Layout

An island in the kitchen is a freestanding bank of cabinets that are not connected to a wall. These are predominantly found in addition to another type of kitchen layout. Often it’s an L-Shape and an Island. The Island is rarely the only layout style in a kitchen. It’s hard to design all the parts of a kitchen like a fridge and sink into an island.
Galley Kitchen Layout
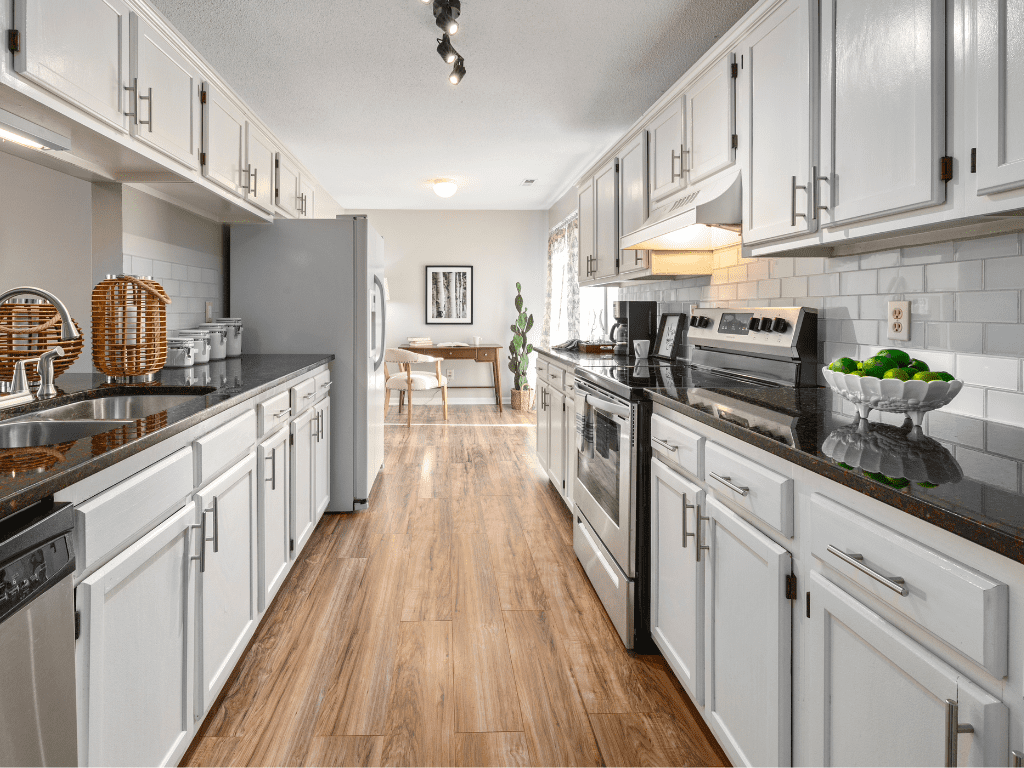
A galley kitchen involves two parallel walls with entrances at either end. These can be very productive kitchens, but don’t offer much of an open concept in its design. They are often found in a home with less open space in its layout. The style of this design can make it harder to work alongside other people at the same time.
- Find out what needs to be done before hiring
- Learn where to go to look for the right people
- Get to know what goes into the interviewing
- What takes place before signing the contract
- Keep up-to-date while the project is happening
Kitchen Design Rules
Design rules in a kitchen are not set in stone. These should be considered as guidelines to help you navigate through this upgrade journey. They are a good jumping off point to help get started, and to think about ideas that can make your kitchen more enjoyable.
The Kitchen Golden Triangle
The kitchen golden triangle, also known as the 3 rule, is a guideline for the placement of the kitchen’s “key zones”. The three main zones are the sink, refrigerator, and cooktop. This rule suggests these three locations are configured in a triangular shape that stands predominantly at the center of the kitchen. The three zones are somewhat evenly spaced, giving a comfortable workflow.
The 3x4 Kitchen Rule
This rule plays off of the Kitchen 3 Rule as seen above. The “3” in 3×4 has to do with placement of three key zones throughout the kitchen. 3 also includes having three feet of usable countertop next to each zone. The “4” has to do with these zones being a minimum of four feet apart. This spacing guideline helps minimize the amount of overcrowding there is with multiple people working in the kitchen at the same time.
Kitchen Color Scheme Rule
Color has such a major impact on a space, and the kitchen is no exception. A good rule to use is the 60-30-10 rule. This says to start with 60 percent of your kitchen being a dominant color, 30 percent will be a neutral color, and 10 percent is an accent color.
Step-by-Step Guide to Kitchen Remodeling
Now that you know the rules for a kitchen remodel, it’s time to put them into action. There is an order to follow in the kitchen remodel that will best suit you. You may want to save some money by putting sweat equity into the project. You may not feel comfortable doing this type of work yourself. It seems challenging at first, but once you understand how to do it, a remodel project can feel very fulfilling in the end.
If you are not comfortable with some or all of this kind of work, that’s not a problem. There are plenty of general contractors in your area that do this professionally. They can be a great resource to ask questions that come up along the way. Finding the right one can seem like a daunting task. That’s why I put together The Contractor Search Guide. It’s meant to help walk you through finding the best contractor for your home remodel project. Click the link to learn more.
Step 1: Know Your Budget
Pro-Tip: Save money with RTA Cabinets
The right kitchen cabinets will be an eye-catching part of any kitchen design. These are going to be your largest expense for your design as well. Search for a company that offers ready-to-assemble (RTA) cabinets. This can be a great way to save money without taking away from your design. They can use the sizes they offer to build a design layout for your space that looks custom in the end. It’s even better if you can get them unassembled because you won’t be paying an assembling fee that can add up quickly. This is perfect for the DIY type that wants to be hands on with this project.
The budget is a boring topic in itself. But without knowing what your budget is for a kitchen remodel, you may find yourself in over your head in no time. You don’t want to get started on the work, and simply not have the money to get it finished. You also don’t want to go into debt for a project like this. It’s not worth it.
The budget list below is an example of what you can expect with this project. It’s broken down into category to give you an idea of what areas will require more money.
Kitchen Budget Percentage Breakdown by Category
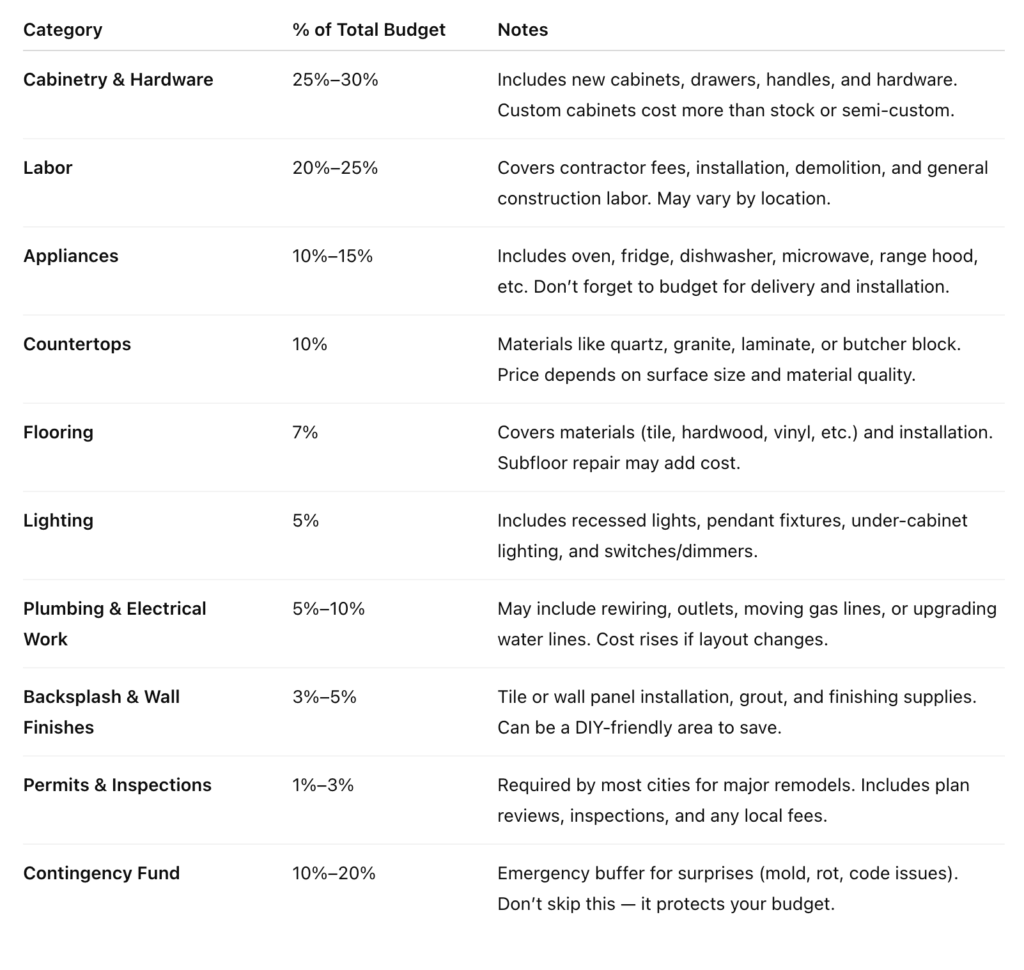
A budget of between 5% and 15% of the home’s value will help land you the best return on investment when you decide to sell. The breakdown of this number is 5% will be for a basic remodel for small things like countertop, backsplash, and lighting. 10% will be mid range and include things like cabinets and flooring as well. And 15% includes high end upgrades and redesign work.
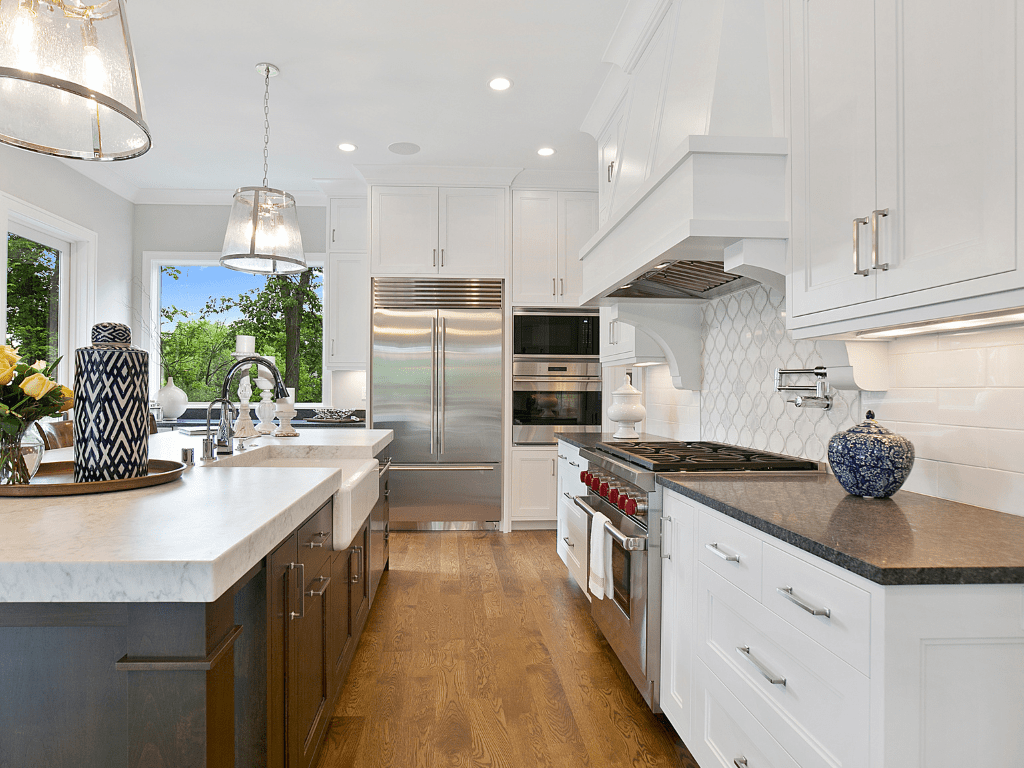
Step 2: Design Your Kitchen
The design phase can be fun if you are a creative person. You get to think about what you like and don’t like in a kitchen. Keep in mind the rules above to guide you through the process and have an enjoyable end product. This part of the phase is one where you get to find what you like and put it together. If it helps, use a kitchen design app to give you more guidance.
Below is a checklist of the main things that go into a kitchen design.
Layout & Workflow
☐ Map out your kitchen work triangle (fridge, stove, sink)
☐ Consider zone-based layout if triangle doesn’t fit your space
☐ Ensure traffic flow allows multiple people to work comfortably
Lifestyle Needs
☐ Think about how you use your kitchen daily (cooking, entertaining, baking, etc.)
☐ Plan for seating, dining, or island features if needed
☐ Decide if you need specialty zones (coffee bar, baking area, etc.)
Storage & Organization
☐ Maximize upper cabinet height and vertical storage
☐ Add pull-outs, deep drawers, and corner solutions
☐ Plan pantry space or a dedicated storage zone
Appliance Selection
☐ Choose all major appliances early (fridge, stove, dishwasher, etc.)
☐ Confirm dimensions to fit cabinetry layout
☐ Consider built-in or panel-ready appliances for seamless design
Cabinets & Countertops
☐ Choose between custom, semi-custom, or stock cabinets
☐ Select cabinet material, color, and finish
☐ Pick countertop material (quartz, granite, butcher block, etc.)
Lighting Plan
☐ Plan for layered lighting (ambient, task, accent)
☐ Include under-cabinet lights for prep zones
☐ Maximize natural light wherever possible
Ventilation & Utilities
☐ Plan for proper range hood or venting system
☐ Know where plumbing and electrical outlets will be located
☐ Coordinate venting and ductwork needs early
Style & Finishes
☐ Define your overall design style (modern, farmhouse, transitional, etc.)
☐ Choose backsplash, paint colors, and flooring
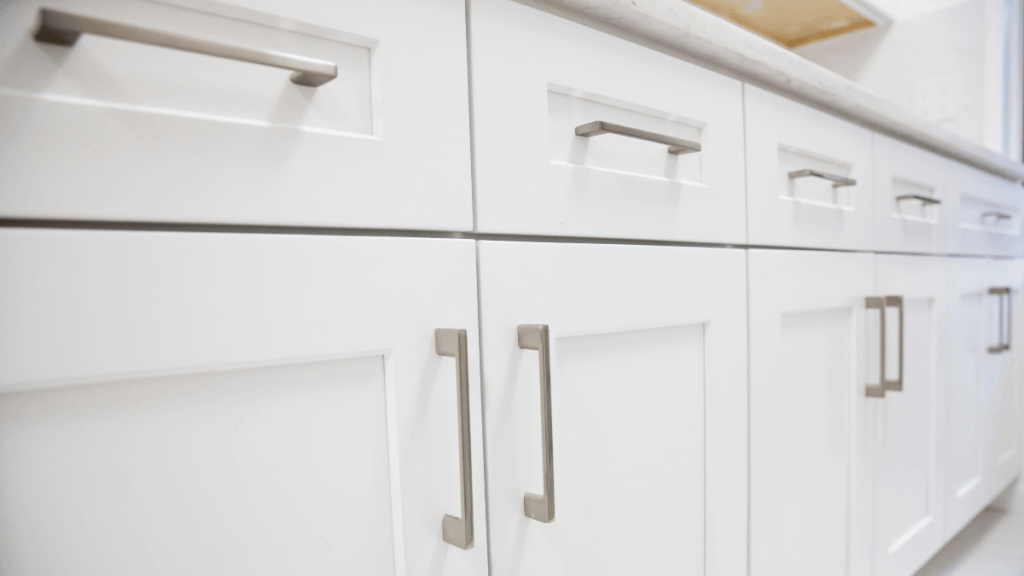
☐ Select cabinet hardware, fixtures, and accessories
Budget & Priorities
☐ Set a realistic total kitchen budget
☐ Prioritize spending on cabinetry, layout, and long-term durability
☐ Choose where to splurge vs. where to save
Final Design Plan
☐ Create or review a scaled kitchen floor plan
☐ Finalize all selections before construction begins
☐ Build in some flexibility for small design changes
Step 3: Source Your Materials
Searching for the right cabinets, fixtures and more may feel like a daunting task. You will be searching both online and in person for things you want to incorporate. The big box can be a good starting point, but some of the items are not the best quality. Things like cabinets, countertops and flooring often are better quality and have more options to choose from with a store that specializes in them.
Here is a list of the order you will be wanting to purchase the materials in.
- lumber
Drywall
Insulation
Electrical materials (switches, boxes, wiring, etc)
Plumbing pipes and fittings
Appliances
Range hood or vent system
Kitchen sink
Faucet
Lighting
Cabinets
Cabinet hardware (knobs, handles, pulls)
Countertop material (quartz, granite, laminate, etc.)
Backsplash tile or panel
Paint and primer
Flooring material (tile, vinyl, hardwood, etc.)
Baseboards/trim
Caulk (paintable and waterproof)
Electrical outlet covers
Step 4: Demolition Work
This phase is a lot of physical work. Not only do you need to remove the old materials, but you also must get them off your property. If you want to save a little money and DIY this phase, get yourself a dumpster and a set of gloves. If you have a contractor to do the rest of the work you will want to discuss what goes and what stays. If you run into any surprises along the way you will want to let them know.
Step 5: Installation
Installation can be a bit of a process. There is an order that should be followed. Each job is a little different, but a basic guideline can be to install the cabinets, flooring, then fixtures. Ask your flooring supplier what order it goes in because some floors can vary. Cabinets are not hard, just take some thought. I wrote an article called How To Install Kitchen Cabinets to guide you through it.
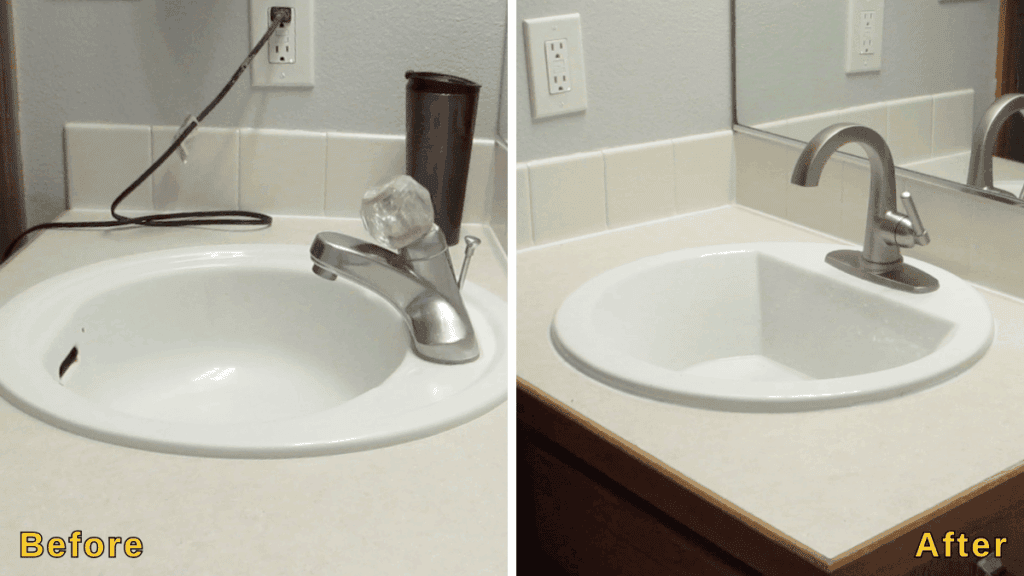
Step 6: Finish Work
This includes painting the walls, installing the sink and faucet, and all the touchup work that’s needed. It is tediously busy work, but can be another way of saving some money for the project by doing it yourself. These small projects can be done with a minimum amount of tools, and can be done at your own pace. Or you can get the project finished sooner and pay the contractor to finish up the finish work.
Top 10 Kitchen Design Mistakes
An unwritten rule for any kitchen remodel is “there will be problems that arise, no avoiding that”. It’s nice if you can foresee some of these problems so you can avoid them, or fix them when they happen. Below is a list of the top 10 kitchen design mistakes, and their fixes.
1. Skipping a Detailed Plan
Mistake: Jumping into demolition or purchases without a full design, timeline, or budget.
Fix: Create a detailed layout, material list, and realistic budget before starting anything.
2. Ignoring Workflow (The Kitchen Triangle)
Mistake: Poor placement of the sink, stove, and fridge, making cooking feel cramped or inefficient.
Fix: Follow the “kitchen work triangle” rule: keep the distance between the three key zones efficient but not too tight.
3. Underestimating Storage Needs
Mistake: Focusing on aesthetics over function, leading to cluttered counters and awkward cabinets.
Fix: Maximize vertical storage, include deep drawers, and plan storage zones for each category (pots, spices, appliances, etc.).
4. Choosing Style Over Function
Mistake: Installing open shelving everywhere, tiny sinks, or trendy materials that don’t hold up.
Fix: Blend style with practicality — pick durable surfaces, ergonomic layouts, and easy-to-clean finishes.
5. Not Planning Enough Lighting
Mistake: Relying on a single ceiling light or overlooking task lighting.
Fix: Use layered lighting: ambient (recessed), task (under-cabinet), and accent (pendants or sconces).
6. Cutting Corners on Electrical and Plumbing
Mistake: Reusing outdated wiring or skipping professional installation.
Fix: Have licensed pros inspect and update wiring and plumbing to avoid future hazards.
7. Blowing the Budget Too Early
Mistake: Spending too much on one element (like high-end counters) and running out of funds.
Fix: Stick to a budget breakdown, with 10–20% reserved for surprises. Prioritize essentials before splurges.
8. Neglecting Ventilation
Mistake: Skipping or under-sizing the range hood.
Fix: Install a proper vent hood that exhausts outside — it protects air quality, cabinetry, and walls.
9. Not Measuring Properly
Mistake: Buying appliances or cabinets that don’t fit.
Fix: Triple-check every measurement — room size, appliance depth, walkways, cabinet clearance, etc.
10. DIY-ing Too Much
Mistake: Taking on work that requires experience (electrical, plumbing, or leveling).
Fix: Know when to hire a pro — doing things right the first time costs less than fixing mistakes.
- Find out what needs to be done before hiring
- Learn where to go to look for the right people
- Get to know what goes into the interviewing
- What takes place before signing the contract
- Keep up-to-date while the project is happening
Frequently Asked Questions
How much should a kitchen remodel cost?
The budget for this type of project can be found in a large price range. There are a lot of options for things like scope of work and quality of appliances to choose from. A realistic budget can be anywhere between $10,000 and $50,000.
Do floors or cabinets get installed first?
The answer to this question depends on the type of flooring you are using. A rule of thumb is if you are using a “floating” vinyl plank floor you will want to install the cabinets first. Every other floor type will go under the cabinets. The most important thing you can do is ask your flooring supplier and go with what they tell you.
In what order should I remodel a kitchen?
Every remodel starts with demolitioning the old materials you are replacing. The installation order will depend on the type of floor you are using. If it is a floating vinyl plank floor you want to go in the order of cabinets, floor, finish work. If it is not a floating floor you can go in the order of floor, cabinets, everything else.
How much does new countertops cost?
New countertops typically cost between forty to one hundred dollars per square foot installed, depending on the material. Laminate is the most budget-friendly at around twenty to fifty dollars per square foot, while quartz and granite range from sixty to one hundred twenty dollars per square foot. Marble, custom concrete, and specialty surfaces can exceed one hundred fifty dollars per square foot. The total cost for an average kitchen ranges from two thousand to five thousand dollars, but high-end materials or larger spaces can push it higher.
Is there an app that lets me design my kitchen for free?
SketchUp is an app that can help design your kitchen. It offers a free version to help you get started, and also a pro version if you want to go to the next level.
Conclusion
Every kitchen remodel goes through stages. The first, and most important is to start with a solid design. Once you have your design planned out, everything else falls into place.
The article above walked you through figuring out what layout you are using, followed by the most important rules that are involved in a kitchen remodel. You also learned the major mistakes that take place during a kitchen remodel project so you can avoid them.
Thank you for visiting Remodel Upgrade. Here we are dedicated to helping you turn your home into your own private sanctuary.
You Got This,
Kevin

Kevin
I grew up in a family where my dad and several uncles were general contractors. They took me to the jobsites, and also taught me so much about home maintenance. I remember spending several summers in high school helping my father build houses. It gave me so much knowledge that I am excited to share!