You’re ready for a new kitchen remodel, but don’t know how to install the cabinets correctly. This daunting task can be riddled with a host of problems. If you are a handy person and have the right tools, this project will be a fulfilling one you accomplish yourself. Follow along with the steps below to learn the right process of installing kitchen cabinets on your own.
The first step is once your cabinets are delivered, you want to inventory all of them. Get the schematics for your cabinet layout, and go one-by-one verifying the cabinet size and door swing. You may want to put a piece of painters tape with some form of labeling on it like the size or cabinet number if it makes things easier for you in the next steps.
Difficulty: Intermediate
Time Frame: 2-4 days
Number of Workers: 1+
Table of Contents
ToggleRequired Tools and Equipment
Cabinet installation tools and equipment is composed of common items many homeowners already have. If you don’t already have any of them, they are good ones to have in your garage. There are some specialty items that can make the job a lot easier, but are not required. We will not be discussing these in the scope of this article.
How to Install Kitchen Cabinets By Yourself
There are more than one way to successfully install kitchen cabinets. The method you are about to learn is my favorite because it allows you to install all the cabinets without needing the help of another person. It is a benefit if you have a helper, although you will see that is not required.
Before installing the cabinets you want to take the doors off. This will keep them safe from damage, and out of the way as you work on the cabinets.
Place them out of the way where they won’t get damaged. I like to place a piece of cardboard on the ground and lean them against a wall. It also helps to mark them with tape and write the cabinet number on them. This helps you know where they go when putting them back on.
Inventory the Cabinets
The first step to this job is to inventory your cabinets. It helps if you use some painters tape and a pen/sharpie to write the sizes on the cabinets as you go. This is an important step because it is going to tell you if there are any problems with the sizes or any missing cabinets.
Check off the cabinet from your schematic as you go through this step, making sure you are accurate and don’t double count any of the cabinets. This step is ideally done as soon as the cabinets are delivered to the job site. You want to be able to tell the manufacturer about any problems as soon as possible.
While you are doing this step, quickly give each cabinet a once-over to be sure there is no major damage. If they were damaged upon delivery you will want to document the damage with photos and show the manufacturer/delivery company. If you are picking up the cabinets from the warehouse this step should be done as the cabinets are loaded into the delivery truck.
Installing Lower cabinets
Pro Tip: If any of the cabinets are narrow enough to not have a stud behind it, or if the stud is up against one of the cabinet’s edges, you will want to screw that cabinet to both cabinets besides it. You can do this by clamping it to the first installed cabinet and installing the next, or install both on either side and then put that one in place to fasten it.
Some people like to start with the uppers first to keep the lowers out of the way, and free from any damage that may take place. I like to go about it with the lowers first, as you will soon see how I use them to my advantage.
Step 1: Mark The Studs
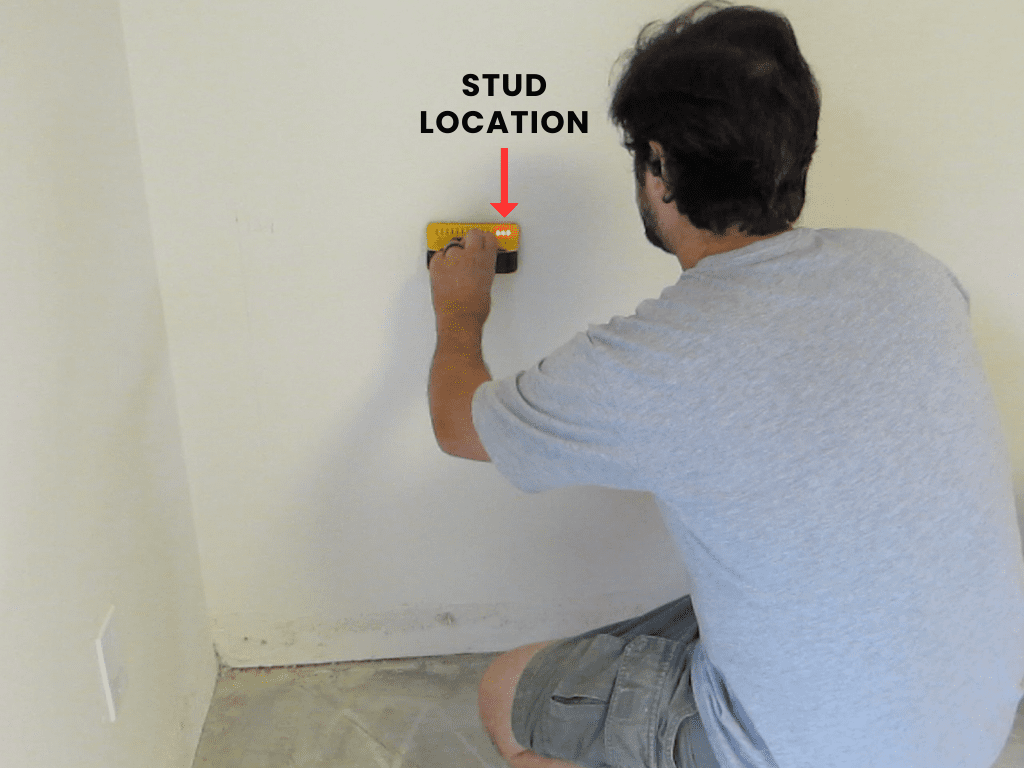
Start with installing the corner cabinet. If your layout does not have a corner you can start with one on the edge of the layout. Find the exact placement of this cabinet before you get started.Use a level to make a vertical mark on the wall at this location. Using the stud finder mark the center of each stud that will fall behind the bank of cabinets.
Use your stud finder to find the measurement from the location of the edge of the first cabinet to the center of the first stud. You can put a vertical pencil mark at that location on the top and bottom stretcher on the back of the cabinet. If you are measuring from left-to-right on the wall, make the mark on the cabinet from right-to-left.
Step 2: Drill A Pilot Hole
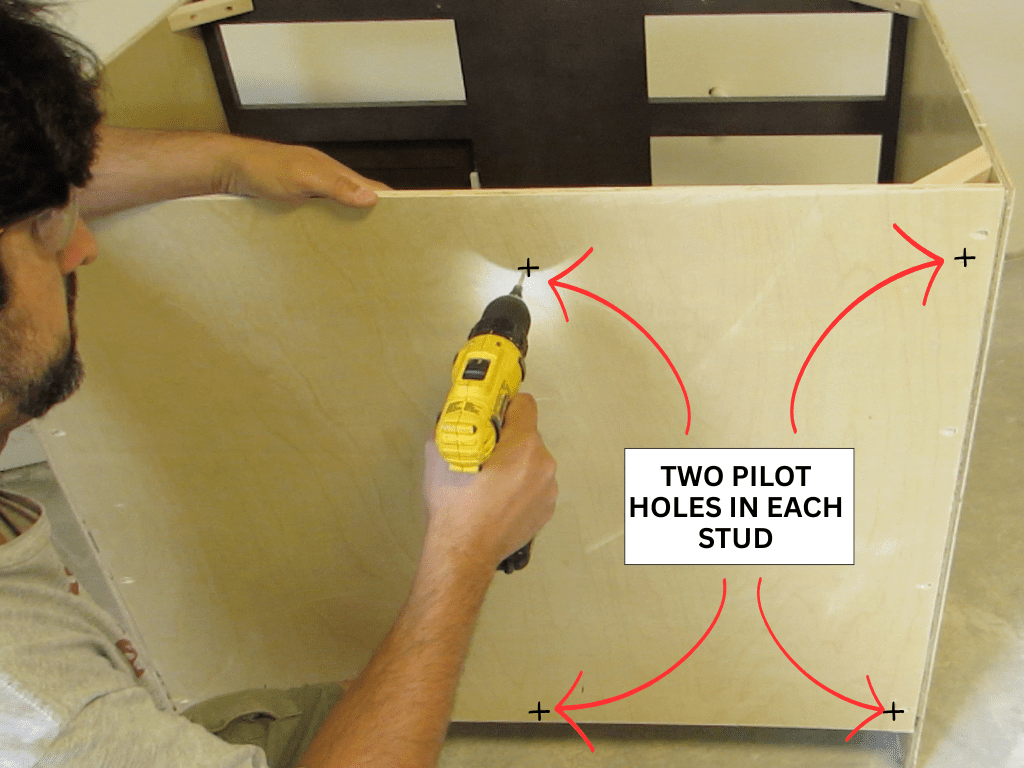
Drill a pilot hole through the back of the cabinet, close to the center of the stretcher. This doesn’t need to be exactly centered, but keep in mind you will need enough space to get the drill in the inside to screw it in. If the screws are close to the edge of the stretcher, it may not be easy to drive them in.
Step 3: Countersink The Pilot Holes
Once you have the pilot holes drilled, use the countersink on the inside of the cabinet to prepare for the screws. This step is only needed if you are using flat head screws. I like these because once installed they are ideally flush with the surface of the inside of the cabinet. It’s possible to use pan head screws if these are available to you.
Get one of the 3 inch screws started in each hole from the inside of the cabinet. Don’t let it poke out the back because this may make it hard to accurately position the cabinet. Keep the drill inside the cabinet during the next steps. You will be using it soon.
Step 4: Position and Shim The Cabinet

Place the cabinet in position, and put the level on top of it. Check for level in each direction as you screw it in. Make sure the screw is going into the stud. Place shims below and behind the cabinet as needed.
Screw the cabinet into the wall, and monitor the level. You may need to back the screw out slightly to be accurate.
As you move down the bank of cabinets it’s possible to clamp the two cabinets together to help keep them consistent. You will still need to check for level as you go, and shim as needed.
Repeat the steps listed above until all the lower cabinets are installed. I recommend installing every lower in the installation before moving on to the uppers. Once these are done you can move on to installing the uppers.
Drill Plumbing Holes in the Sink Cabinet
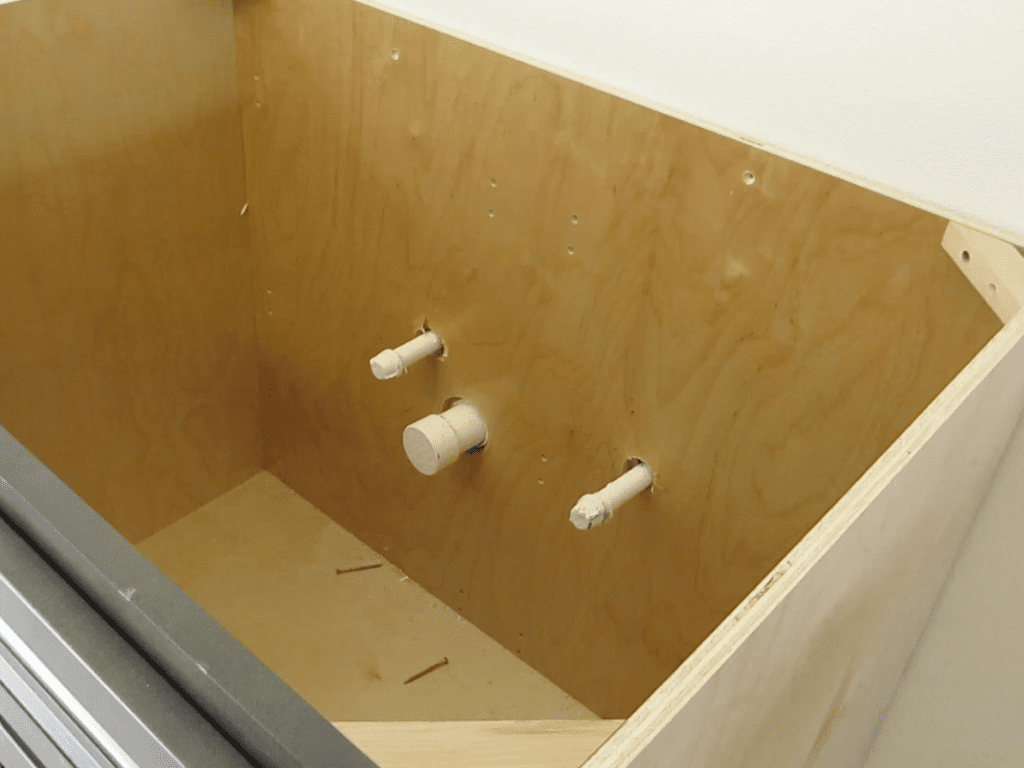
The sink cabinet takes a bit more preparation to install. The pipes coming out of the wall need a way to be fed through the cabinet. There are two ways to do this. Lets quickly talk about both of them.
The easiest way to prepare a cabinet for the water lines is to cut a rectangular opening in the back of the cabinet larger than the area the pipes need to go through. This is a good option if you don’t have the right tools for the next method. Make this cut by drilling a few pilot holes in the corner of your opening, and use a jigsaw to make the cut. This is a quick and easy way to get the cabinet installed.
Keep in mind that whatever way you do this it will be visible from inside when you open the cabinet doors. I like the cut to be as hidden as possible. That’s why I like to make the holes as subtle as possible. This can be done with a tool you attach to your drill called a hole saw. Lets take a closer look at the process of drilling these holes for the plumbing to go through.
Step 1: Mark The Locations
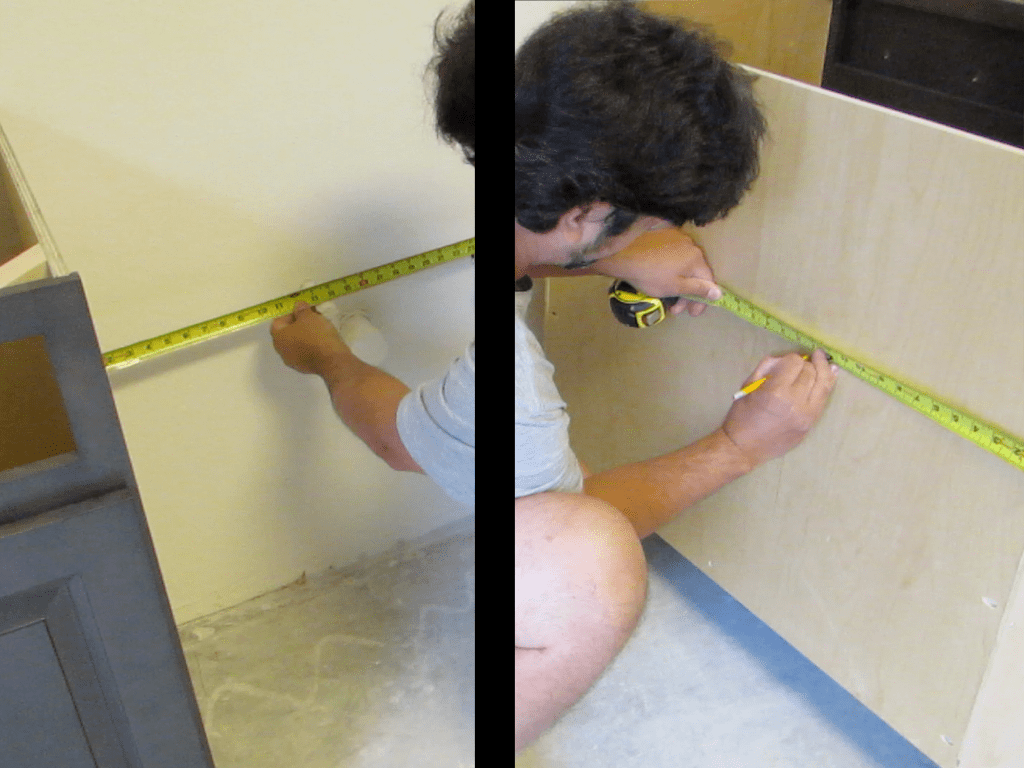
The location for each hole will need to be transferred onto the back of the cabinet. To do this you will need two reference points to use. These can be a cabinet directly next to this one that’s already installed, and the floor.
When measuring to the center of the pipe from a cabinet on the left, the same measurement should be transferred to the back of the sink cabinet from the right. This will keep the holes lined up with the pipes when you slide the cabinet into position. Make a mark for the center of the pipe from the side, and from the floor. The intersection of these marks will be the center of your hole.
Step 2: Drill The Holes
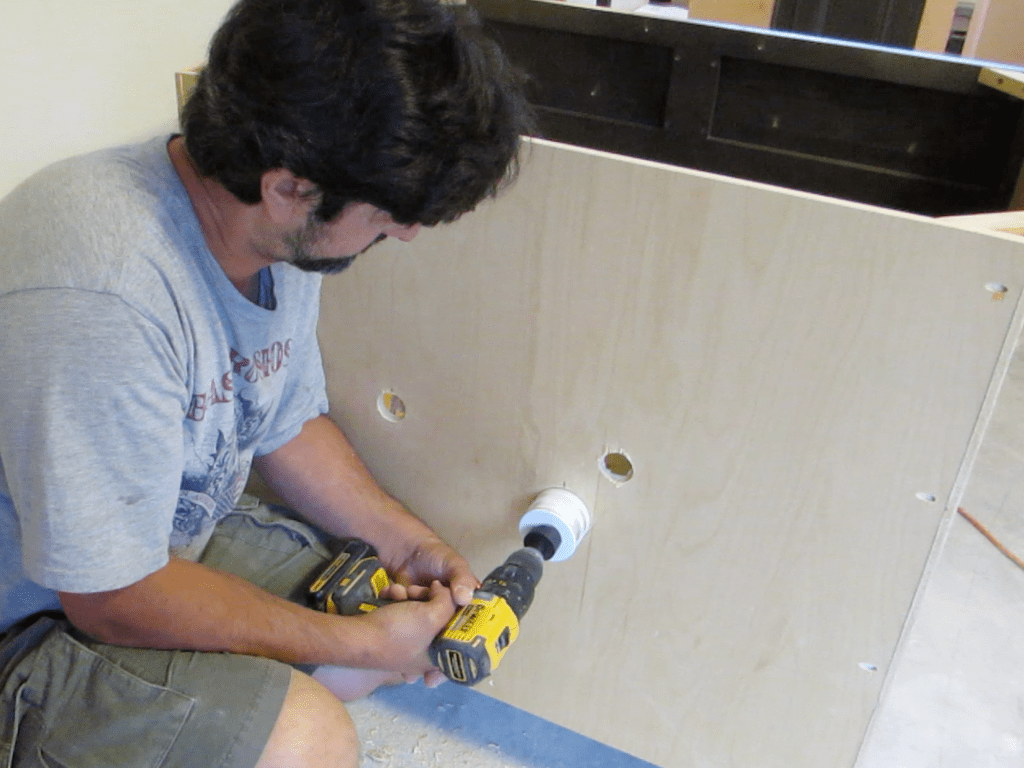
Once you have all the holes marked for each pipe, measure the diameter of the pipe at it’s widest location. This is often the cap or valve on the end of the pipe. The hole saw you use will need to be slightly bigger than this diameter to allow the pipe to slide through smoothly.
There may be the issue of the pipe being at an angle. The hole may need to be widened in the direction the pipe is leaning in. This can be done with a file, jigsaw, or another pass with the hole saw.
How to Install Kitchen Cabinets on a Wall By Yourself
Disclaimer: It is best to have a helper when lifting cabinets. Always use safe lifting practices like lifting with your knees, not your back. DO NOT lift cabinets if you have had a back injury in the past.
Now that all the lowers are in place, it’s time to move on to the uppers. It is recommended to have a helper when lifting these cabinets. If they are small enough you may be able to safely lift them on your own.
Building an Upper Cabinet Support Box
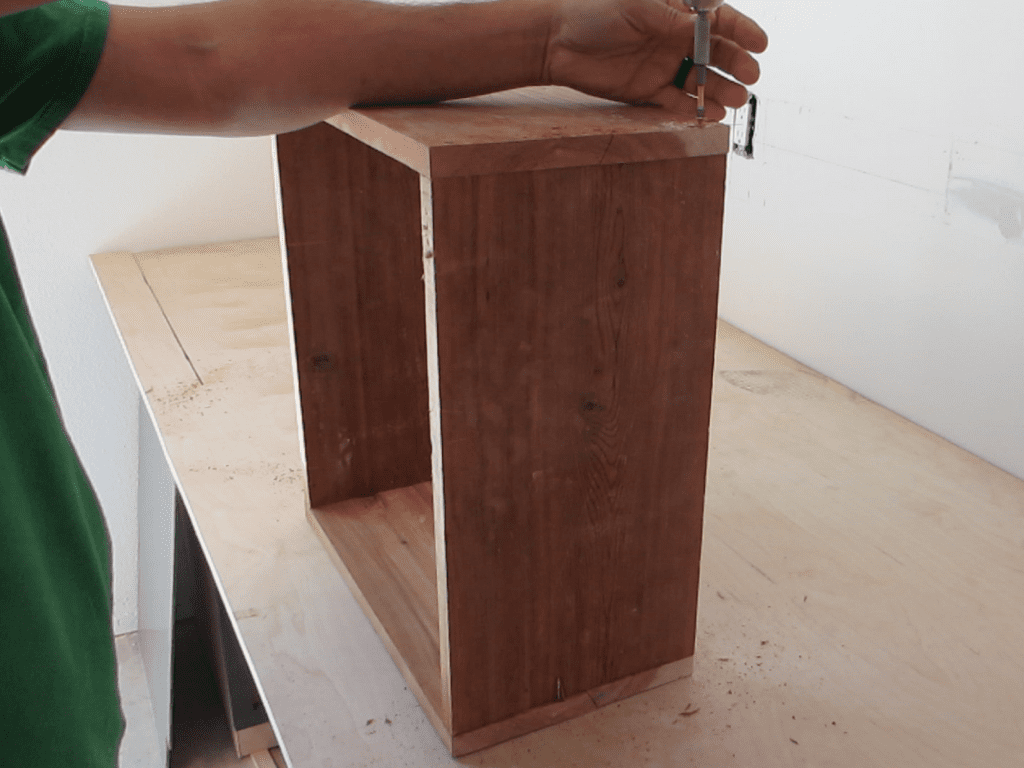
One of the easiest methods of hanging upper cabinets at the correct height is to build what I like to call an upper cabinet support box. The concept is simple. It’s a wooden box that is the exact height needed to hold the cabinets in place as you install them.
It’s especially helpful if you don’t have an extra set of hands to hold the cabinets. You just need to be careful getting the cabinets into place on top of the box.
The height of it should be the precise distance between the top of the lower cabinets and the bottom of the upper cabinets. This measurement is usually 18 inches above the countertop. It should not be more than 20 inches above the countertop.
Knowing Your Countertops
Countertop installation is a specialized process that requires particular equipment. For this reason I ask my cabinet maker what company they recommend. Ask the company providing the counter tops these questions:
What is the exact thickness of the countertop?
Does it require an underlayment to be installed? If so, what thickness should this be?
If your countertop requires an underlayment, you may need to install this before the countertops get installed. It can be installed before the uppers because it would be helpful for the support box to rest on.
Lower cabinets tend to have a large opening on top. This makes it difficult to rest the support box on them. Lay a piece of plywood across the top, making a stable platform to work with. The thickness of the plywood will need to be accounted for when determining the height of the box.
How to Build The Upper Cabinet Support Box
I like to use whatever materials I have on hand to make this support box. The thing that matters the most is it will support the upper cabinets well when being used. It should be at least half an inch thick, and twelve inches wide if possible. You can get away with a little leeway here, so be creative.
This is a temporary structure that will only be used during the installation process. For that reason try not to spend a lot of money on it.
The box will need to be sturdy enough to hold the cabinet without wobbling. Your materials should be strong enough to hold about 20-40 pounds. I like to use plywood or other flat dimensional lumber for this. That’s because this material is easy to find, and cut to the right size.
The method I am about to share with you is for a box made out of plywood, but if you want to use something else take into consideration the thickness and make your adjustments accordingly.
Cabinet Support Box Dimensions
18 in (Wide) X 12 in (Deep) X 18 in + (countertop thickness) – (support plywood) (Height)
The height is the most important dimension. This will ensure the height of the uppers is in the right place. It should be wide enough to hold the upper cabinet steady. Upper cabinets are typically 12 inches deep, and this is a good depth for the box. 18 inches width is good, but feel free to make it wider if you think that will help.
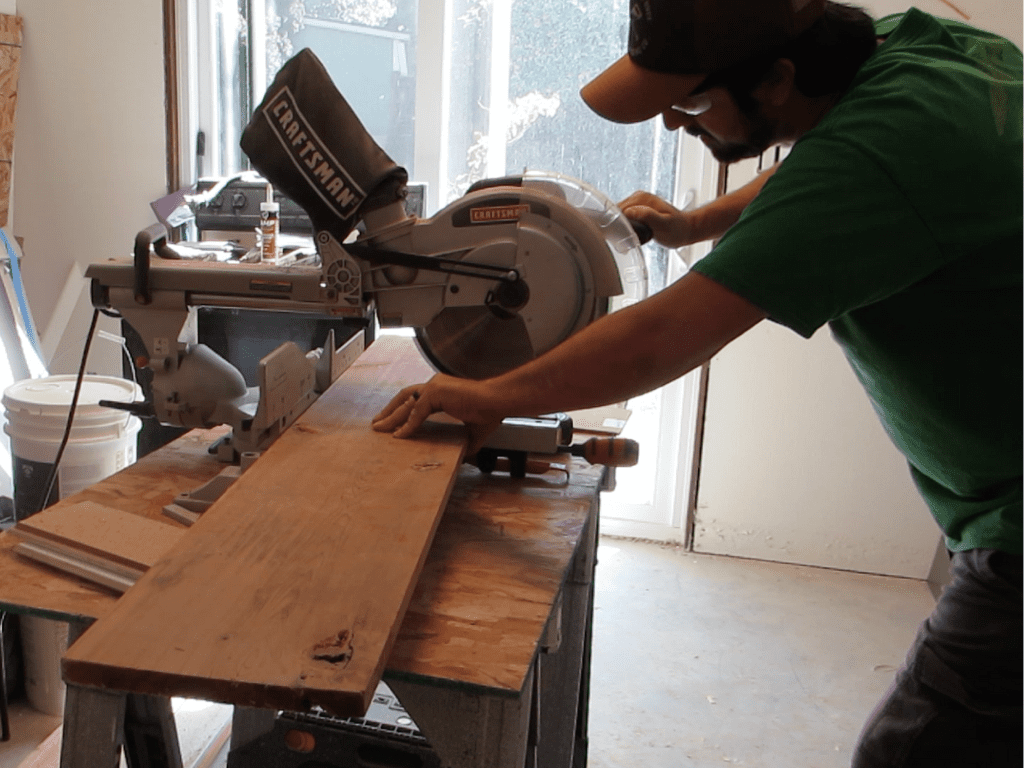
Step 1: Rip Cut Some 12 Inch Pieces
Make a rip cut with a table saw. If you don’t have this you can use a circular saw and straight edge. Measure and mark 12 inches along one of the edges of the plywood. Repeat this several more times along the same edge that you can draw a straight line on. Once the line is in place you can make a rip cut along it. You can then move on to the next step.
Step 2: Cut the Pieces to Size
In this example we are going to say you will be installing a 1 inch countertop on the base cabinets with no underlayment. This makes the distance from the top of the lower cabinet to the bottom of the upper cabinet 19 inches. The thickness of the material you are using to make the box is half an inch. Also a half inch piece of plywood will also be used below the support box.
Sides of Box = (19 in) - (0.5 in) - (2 x 0.5 in) = 17.5 inches
Use the 12 inch wide material to cut two pieces 17.5 inches long. These are the two sides of the box. Cut two more pieces 18 inches for the top and bottom.
Use the 1.5 inch screws to screw these four pieces together. Clamp the four pieces together and drill pilot holes. Screw into these pilot holes, making sure the heads are flush with the material.
The orientation of the pieces is important. The top and bottom pieces should be on top of the edges of the side pieces. The reason for this is it is important that the finished height of this box is 18 inches.
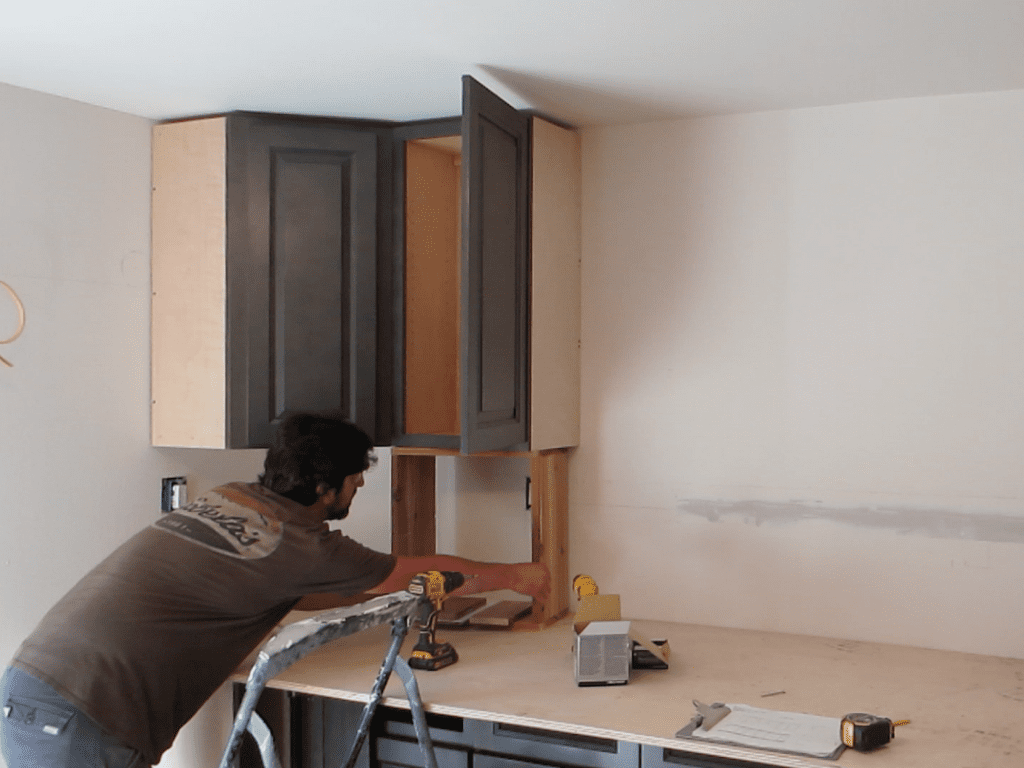
How To Install Upper Cabinets
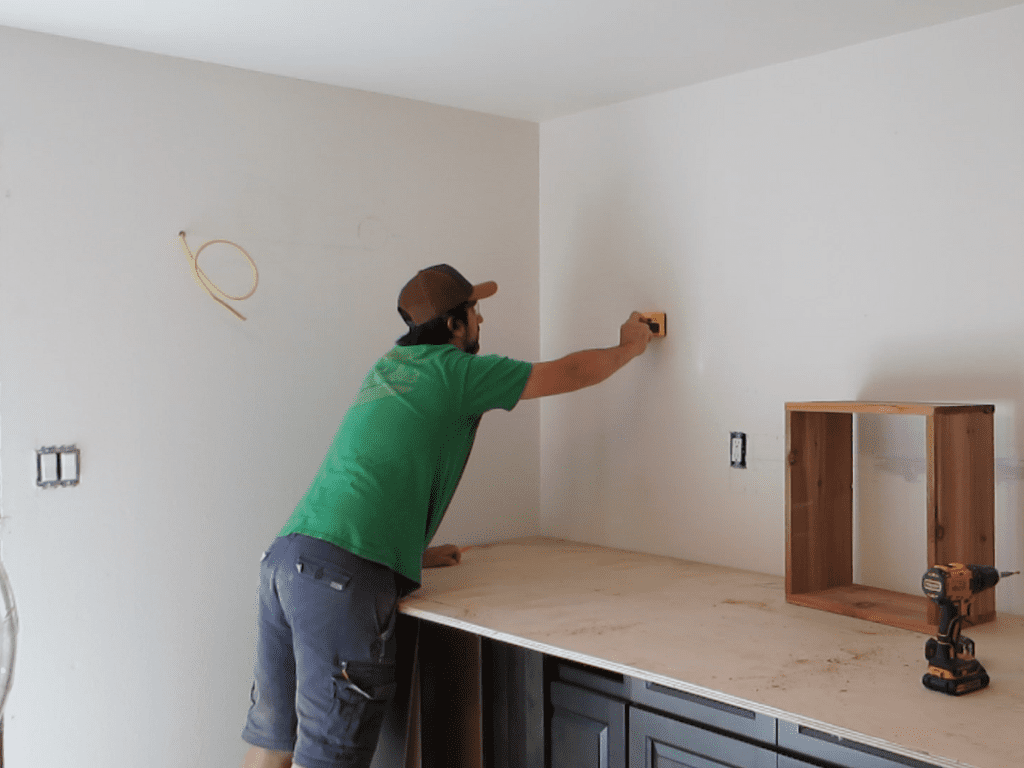
Before starting you will want to have a line on the wall that shows the location of the bottom of the upper cabinets. The line should be level, and run where at least part of each cabinet is. You can use a pencil and straight edge/level, or a chalk line for this. The line will be a reference that keeps you accurate during the installation process.
Measure up from the top of the lowers a distance of 19 inches. Place a mark on the wall at this spot, and continue approximately every two to three feet down the row. Use a long level or straight edge to draw a line through all these marks.
Using the Support Box to Install Upper Cabinets
Place the half inch piece of plywood on the lower cabinets near the corner. When the support box is on it the top of the box should be at the line on the wall.
The steps for installing the uppers are the same as outlined in the section above titled Install Lower Cabinets. Repeat these steps with the uppers, working from the corner along the wall.
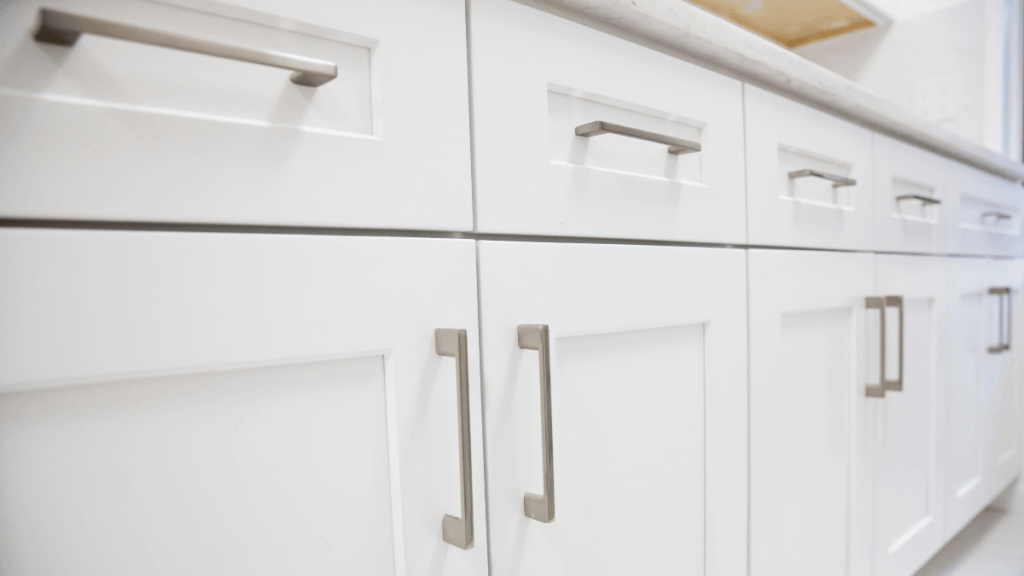
Once all the cabinets are installed it is time to do the finish work on them. This includes hanging moulding, cabinet hardware, and touchup. These steps are not included in the scope of this article but are not hard at all.
Frequently Asked Questions
Can I install kitchen cabinets myself?
You CAN install kitchen cabinets yourself, as long as you are handy with tools and good at following directions. There is a simple process as discussed above that when done right will allow you to successfully install kitchen cabinets yourself.
How are kitchen cabinets attached?
Kitchen cabinets are attached to the wall using screws that are long enough to grip into the studs. These screws are generally around 2.5 to 3 inches in length. You want them to be this long because they need to go through the cabinet and drywall to grip the stud.
Do you install base or upper cabinets first?
Both methods are used for different reasons. I prefer to install lower cabinets first because I like to use them to support the upper cabinet when installing them. Some people prefer to hang the uppers first because they don’t want to be working around the lowers, potentially damaging them.
Do you leave shims under cabinets?
Shims can be left below the cabinets. They will need to be flush trimmed once the cabinets are installed, preventing them from sticking out past the edges of the cabinets. The sims can be in the way of other parts of the cabinets like the toe kick, or even the floor installation.
Conclusion
Congratulations on installing kitchen cabinets by yourself. It’s a lengthy process with some repetition involved. The nice part is once you get in the groove it goes smoothly. Take your time and get it done right the first time. If something is wrong, take a moment to correct it so it doesn’t become a larger problem later on.
Thank you for reading this Remodel Upgrade blog post. I am dedicated to helping you turn your home into your own private sanctuary. Click an article below to read a similar topic.
You Got This,
Kevin

Kevin
I grew up in a family where my dad and several uncles were general contractors. They took me to the jobsites, and also taught me so much about home maintenance. I remember spending several summers in high school helping my father build houses. It gave me so much knowledge that I am excited to share!