Home Repair

PVC Pipe

How To Cut PVC Pipe

Knowing how to cut PVC pipe the right way is a skill every homeowner should know. PVC has many uses around the house, other than the plumbing purposes it was designed for. Cutting PVC is much easier than you think. Read on to find out what the best way to cut PVC pipe is with the use you have in mind. PVC pipe is a plastic pipe that is available in various sizes. It’s possible to cut it with a large variety of tools, and we will be discussing several of them in this article. There are three tools that are the most commonly used to cut PVC pipe. The number one tool is a hacksaw. Next is a ratcheting PVC pipe cutting tool. And the third most used option is an oscillating cutting tool. There are benefits to each of these options that we will talk about in a bit. The most common use for PVC is low pressure water transportation. An example of this is using it in a sprinkler system like one used to water a lawn. But the versatility of PVC is endless, as it is also a commonly used material for many crafts and DIY projects. Protective Equipment Safety Glasses Gloves It’s important to make sure you use proper safety equipment when doing any type of physical work that has moving parts. Cutting PVC pipe is no different. There are a few places that you can get injured, so for that reason we use protective equipment to help limit any injuries. It’s the hands and eyes that are the main places that can take an injury from this project. That means the two pieces of protective equipment to use are safety goggles, and work gloves.  The safety goggles are important because several of the methods for cutting PVC will create burrs. It’s possible for these burrs to get in your eyes, so that’s why we wear safety goggles. Gloves are helpful because any of the methods used to cut PVC use sharp objects. We don’t want to risk cutting ourselves, so we wear gloves. They are also helpful with gripping the pipe during the cut. Tape Measure Felt Tip Marker The first step for making a cut is to know where it’s going to be. You are going to do this on pvc by using a tape measure and a felt tip marker like a sharpie.  Hold the tape measure to one side of the pipe, and pull it out past the length you want to make the piece. Make a small mark with the sharpie at the location it is supposed to be.  When you are cutting the pipe you want it to be as close to this mark as possible. Don’t leave too much extra space because you will need to make another cut. An even worse problem than this is if you cut the piece too small and need to start over. Try to be as accurate as possible. Best Methods For Cutting PVC Pipe Using Hand Tools Now it’s time to talk about the method of cutting the pipe. There are two main camps we put the tools for cutting PVC pipe in. The first are hand tools, and the second are power tools.  The main goal when cutting PVC is to make the cut straight. If you are cutting it to attach fittings on the end, you are allowed to be a few degrees off of 90, but not much. Let’s talk about some of the different hand tools we use to cut PVC pipe. Cutting PVC Pipe With Hand Tools There are various tools that are commonly used for cutting PVC pipe. The first grouping we will talk about are the different types of saws. After we go through the saws, we will take a look at one hand tool that specializes in cutting PVC pipe. The common feature for all of these saws here is they have small teeth. This is a feature that is used for a fine cut when working with wood, or is needed for cutting metal. A fine toothed blade is important for cutting PVC because if the teeth were larger like on a hand saw used for cutting wood it would catch on the pipe and possibly tear it rather than cut. The biggest downside for cutting with any of the saws listed below is you will need some space around the pipe to use the saw. Saws are used by pushing and pulling it back and forth. This means they require several inches to about a foot on either side of the pipe. This will not work very well if the pipe is in a tight spot like framed into a wall. Thankfully we have a solution for this predicament. Cutting PVC With A Hacksaw The hacksaw is a commonly used tool for homeowners to have in their tool box. Using it to cut PVC is one of the most popular uses. There are a few things to focus on when cutting a piece of PVC with a hacksaw. Hack Saw Hold The Pipe Steady Like cutting anything with a saw, PVC needs to be held stable in order to make the cut. The best way to do this is to lay it on a solid surface, and hold it with one hand. If you want to be sure the cut is going to be as accurate as possible another thing you can do is use clamps to hold it down.  How To Cut PVC Pipe Straight With A Saw A miter box is an open top box with several tracks (or grooves) that a handsaw fits in. The tracks are positioned in several commonly used angles, but in this case we are going to use the straight 90 deg angle.  Use one hand to hold the pipe inside the box, but located towards the front of it. The other hand will use the saw. Place the saw in the track

How To Cut PVC Pipe Read More »
Installing A Toilet

How To Install A Toilet By Yourself

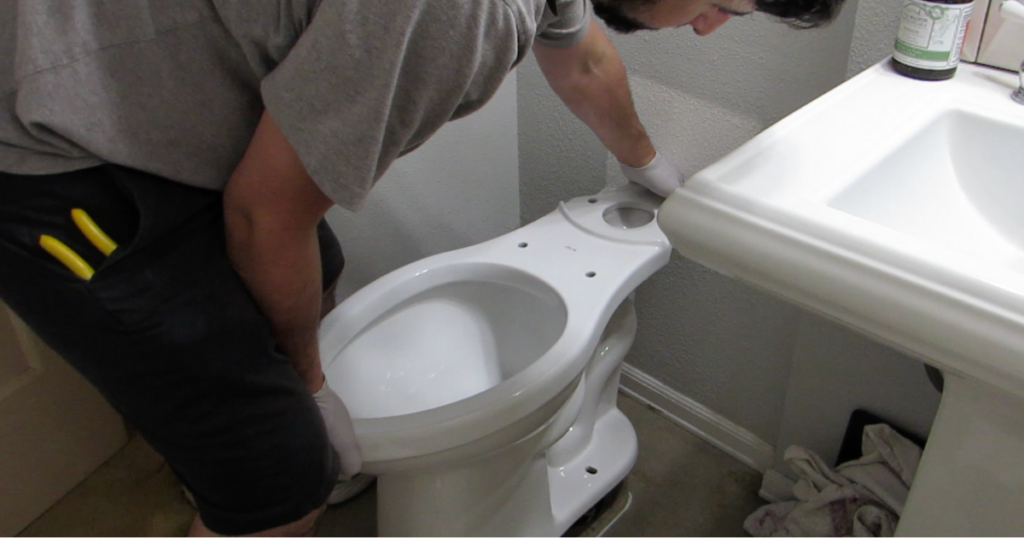
Learning how to install a toilet is not difficult. You don’t need any special tools beyond what you probably already own. This is a single person job that takes under an hour to finish. Take a look below for a list of tools, and the complete steps to successfully install a new toilet.  Some toilet installs do not require all the tools below. This is dependent on what toilet installation kit you are using. Some kits require a hacksaw to cut the bolts that secure the bowl to the flange. Jump to the Secure the Toilet section below to see if you need a hacksaw.  You may also need to replace the supply line (the water line that connects the toilet to the water valve on the wall. If your supply line is deteriorating a great deal you may want to buy a new one for this installation. You want it to be the same length as the one you have now. Measure the size of the connection attached to the valve on the wall, and talk to the people at the hardware store for help finding the exact one. Most times the existing one is fine to use again. We both know the best accessory for a toilet is a bathroom exhaust fan. If you are in the market for a bathroom fan i recommend visiting the article on The Best Bathroom Exhaust Fan will walk you through the steps on picking the right fan for your bathroom.  https://www.youtube.com/watch?v=VbMmGao_0Ug How To Install A Toilet Step-By-Step The steps listed below will guide you through the process of removing the old toilet and installing the new one. I have a video for you to check out if that’s an easier way for you to learn how to do this type of project. The video has the same steps outlined in this article. Click on the video above for that tutorial. The most important thing to remember during this process is to not overtighten any of the bolts during this project. You will be working with porcelain which is susceptible to cracking if too much pressure is put on it. The amount of tightening should be up to where the bowl, tank, or seat does not wobble. Once you get to this point you can stop tightening. Shut Off The Water Supply To The Toilet I like to start this job by putting on rubber gloves. It makes me feel more comfortable when working with a used toilet to start by wearing gloves. Make sure you have extras handy and they are the right size because they may break during the process of this job.  The water supply line is a water valve that sticks out of the wall near the ground. It’s usually somewhere behind the toilet to the left of it. Turn the valve to the right until you can’t turn it any more.  You will need to get on your knees to find it. Remove Old Toilet Removal of the old toilet happens in a series of steps. With the water shut off you can flush the toilet to remove the water from the tank. There will still be some water in the bowl that can spill out when carrying it. This is why we use the garbage bag. Loosen the bolts at the base of the toilet. There is one bolt sticking up on either side of the bowl near the floor. Oftentimes there is a smooth cap covering the bolt. You can use the putty knife or the flat screwdriver to pry the caps off.  Once the caps are off use the crescent wrench or the channellock pliers to loosen and remove the nuts. Take the nuts and washers off. Once the nuts are off, the toilet is free and loose from the floor. Open up the garbage bag and place it on the floor next to the toilet. When you lift the toilet straight up and off the bolts, place it on the garbage bag so any spills go in there and not all over the house. We use the contractor garbage bag for this because usually the kitchen garbage bags are too small to fit the toilet. If the toilet is too heavy to lift alone, you may want to get someone else to help you lift it. If you don’t have someone to help you, remove the tank from the bowl. This can only happen if you have a two piece toilet. You may need to lay on the floor to loosen the tank from the bowl.  To remove the tank there are some plastic bolts that connect the tank to the bowl. Loosen the nuts with the channellock pliers. This can be brought directly outside when it is removed. Remove the Old Wax Ring The wax ring is used to prevent any sewer gasses from filling up the bathroom and causing a nasty smell in the house. It’s important to remove as much of the old wax ring before we can place the new one.  Use the putty knife to scrape the wax off the flange. Any pieces of wax that are removed can be put in a disposable bag. A shopping bag is the perfect size for this stage of the job. Some wax rings have a funnel shaped gasket that faces downward into the toilet flange. This gasket needs to be removed from the flange along with the majority of old wax. Not all wax rings have this part. You won’t be able to get every last bit of wax off the flange, but do your best to scrape as much off the flange as possible. The toilet flange is the circular hole that is in the floor of the bathroom. It’s the hole that the water goes down when the toilet gets flushed.  Disclaimer: Do your best to not drop anything down the flange hole, including chunks of wax. You may want to stuff a large rag in the

How To Install A Toilet By Yourself Read More »

Circuit Breaker

How To Reset A Circuit Breaker

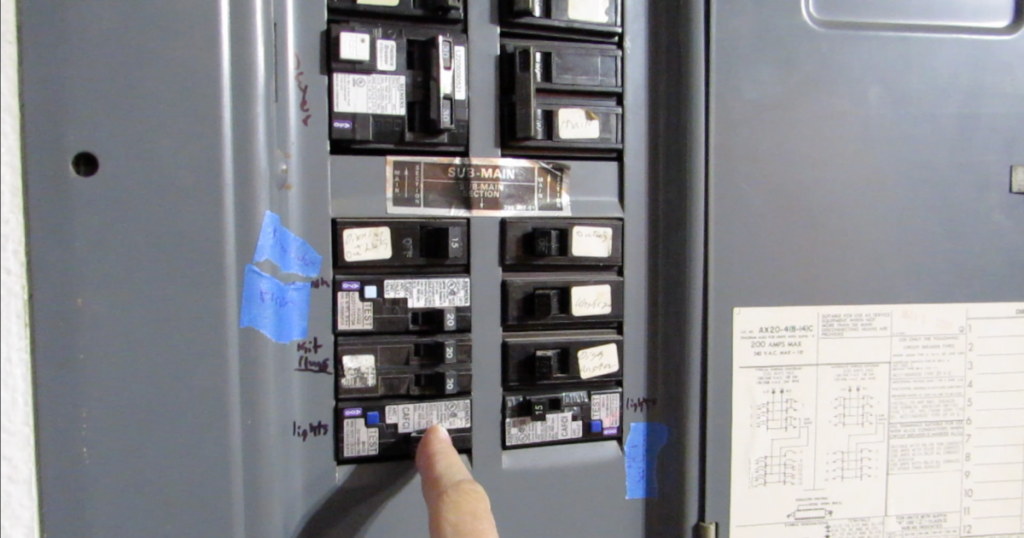
Knowing how to reset a circuit breaker is a valuable skill to have. It is not difficult, and can be done quickly. It can be dangerous if not done correctly. Follow the steps below to reset your circuit breaker the right way. Causes Of A Tripped Breaker Before dealing with the breaker box, it is important to understand what caused the problem in the first place. The breaker box is the location that the main electricity supply has come into the house. This supply is then divided up to various circuits around the house. This is to reduce the total electric flow going through the outlets and light fixtures, making it safer for us when using them.    We say a circuit is “tripped” when it has been overloaded and no longer has power going to it. The breaker is designed to switch off, or “trip” before the electricity in the wires gets to a dangerous level.   One way a circuit trips is when a GFCI outlet overloads and switches to the off position. If this happens, every other light and outlet on the same circuit after the GFCI will be turned off as well. You want to switch the outlet back on to regain power to these locations.  GFCI Outlet Ground fault circuit interrupter or GFCI outlets are electrical outlets that are designed to be placed in proximity to water. It is recommended to have one of these outlets within 18 inches of a water source like a sink faucet.   These outlets will trip, or switch to the “off” position when they are shorted or overloaded. You can push the reset button on the outlet to switch it back to the “on position. If it is not turning back on you may need to switch the breaker back on at the breaker box. How To Reset A Tripped Circuit Breaker Resetting a tripped circuit breaker is a simple process. If it tripped after you turned on a light or appliance, you want to unplug it or turn it off before switching the breaker back on. This is because you may run into the same problem of the circuit being overloaded after you switch it on.   Go to the circuit panel. This is usually in the garage, but may be in another location. It should be somewhere that is easily accessed.    There is also a chance of there being a subpanel which is separate from the main circuit panel. The subpanel looks similar to the main circuit panel, but generally smaller. The circuits in this panel are the same type as the main, and are checked the same way.   Open the circuit panel, and look for a circuit that is “tripped”. This is indicated by the switch on the circuit that is in a different position than the rest. When they are in the “on” position they are facing the center of the panel. When they are tripped they are facing straight out. The “off” position is facing to the side of the panel.   If it’s hard to tell which breaker is tripped, it’s okay to lightly push on them in the “on” direction. The ones that are not tripped will not move. The one that has been tripped will have a bit of movement, but will spring back into the center.    Once you find the one that is tripped you want to flip it to the off position (towards the side of the panel). This will reset it. Now flip it to the on position. Congratulations, you reset a circuit breaker. Tripped Circuit Breaker Won’t Reset There is a chance the tripped circuit breaker won’t reset. If after you switch it to the on position it trips again you have a bigger issue. This can be caused by one of several problems that is happening.    If you are a novice when it comes to electrical work I recommend seeking professional help. Electrical is not something you want to mess around with if you don’t know what you are doing.    I put together a guide that will help you find a reliable contractor. This guide tells you what interview questions to ask once you found a potential candidate. It lets you know what their answers mean, and who you should avoid. And once you find the person you want to use it helps you draft up a contract to help protect yourself.   It’s called The Contractor Search Guide. Check it out by clicking the image. How To Reset A Breaker In An Apartment Resetting a circuit breaker in an apartment is similar to the steps listed above. Hopefully you know where the circuit breaker is. It may be in a closet, or somewhere else hidden. This is a good thing to know where it is once you find it.  Frequently Asked Questions How do you know if a breaker needs to be reset? The first sign that you will need to reset a circuit breaker is there is no power going to something you have plugged in. This could be a light, your cellphone, or a major appliance.    Once you get to the breaker box, the first way to tell which circuit breaker is tripped is when the switch on one of them is facing the center position, when the others are all aimed at either the left or right position. You can push on this one in the direction the others are facing, and you will feel a spring like resistance. This means it is time to go through the process described above to reset it. What happens if a circuit breaker won’t reset? There are several reasons why a circuit won’t reset. The first one you want to consider is if there are any GFCI outlets on the circuit. If so, this outlet may be the culprit for why the power is not turning back on after resetting the breaker.   There also may be the

How To Reset A Circuit Breaker Read More »

stop a toilet from running

How To Stop A Toilet From Running

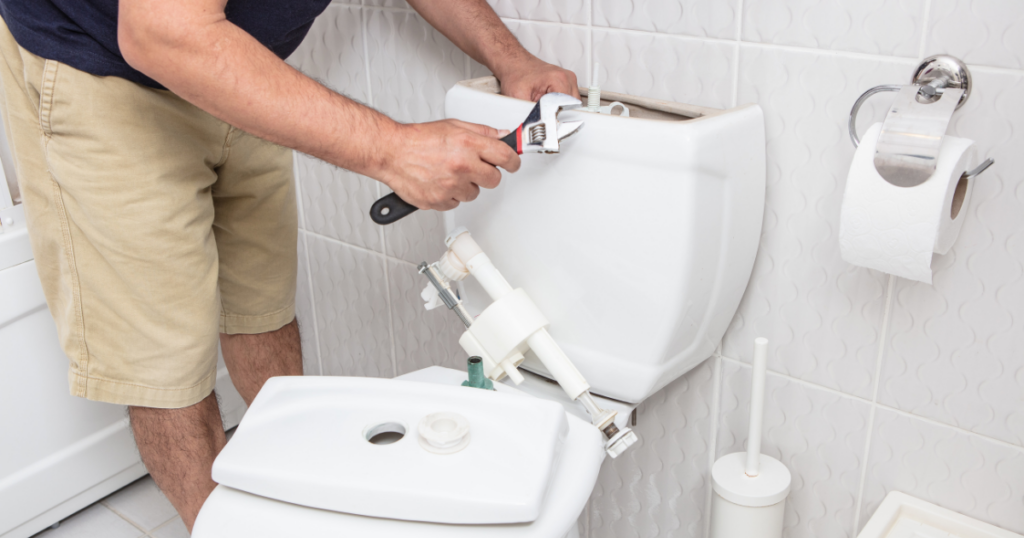
Knowing how to stop a toilet from running is a quick and simple process. You don’t need any special tools, and replacement parts are inexpensive. If you are not a diy, hands on type you can still fix a running toilet yourself. Follow the process in this article instead of paying an expensive plumber. There is a chance that after you try all the options in this article, your toilet is at a point that it needs to be replaced. You will know this after you fix it and another problem comes back a little later.  The good news is changing a toilet is not difficult. Take a look at this article on How To Install A Toilet By Yourself. I walk you through the steps on switching out your toilet yourself. This is another project that isn’t complicated. Contents Diagnosing The Problem Parts of a Toilet Toilet Keeps Running Randomly Toilet Runs Constantly Toilet Keeps Running After Flushing How To Stop a Running Toilet In Seconds How To Fix A Running Toilet How To Fix A Running Toilet With A Button Flush Frequently Asked Questions Diagnosing The Problem Toilet Runs After Flush Toilet Runs Constantly Toilet Runs Randomly The reason for a toilet to run after being flushed is the flush valve is not going back down after the flush. There can be more than one reason for this, but they are easy to find. A constantly running toilet happens when the float is sitting higher than the overflow pipe. If the float is unable to do its job properly, it will not turn the water supply off.  Randomly running toilets happen because the flapper/flush valve gasket is faulty. There are more than one reason for this, and there are more than one solutions to this. Parts of a Toilet There are more than one type of toilet out there. They all have similar parts, and work basically the same way. Once you understand the components that make a toilet work, you will understand more about how they may fail and cause the toilet to run. Most of the parts below are in every toilet style. The flapper and fill valve gasket serve similar functions but are different parts. And the other parts can look different but have the same functions.  Fill Valve The fill valve is a vertical pipe with a valve at the top. It regulates the water flowing into the tank. It is designed to shut the water off when the float gets to a certain height. Float The float is a piece that rises with the water level. As it reaches a certain height it shuts off the water flowing out of the fill valve. The height of the water level can be adjusted by raising or lowering the float.  Float Adjustment All floats have a way to adjust them. The floats on a newer fill valve generally have an adjustment screw. If turned to one direction it raises the float height, and the other direction lowers it. If your float is the type that is connected to a metal rod you will grip the rod with both hands, and bend it in the direction you want it to go. Overflow Pipe The overflow pipe is a requirement for all toilets. In the event of the fill valve malfunctioning, the overflow pipe transfers water to the toilet bowl instead of overflowing the tank. The height of this pipe should be below the tank rim. The water level height should be between one quarter of an inch and one inch below the top of the overflow pipe. Flapper The flapper is a rubber piece that is connected at the base of the overflow pipe. It is used for some toilet designs to create a watertight seal in the opening of the bottom of the tank. It is connected with a chain to the handle, which raises the flapper whenever the toilet is flushed. Flush Valve Gasket The flush valve gasket is a piece that has a similar function to a flapper, but on a different toilet design. Flush valves are a more compact stack that the gasket goes around, unlike a flapper that is offset.  Handle The handle is the portion of a toilet that we use to flush when necessary. Inside the tank the handle is connected to the flapper or flush valve with a chain. Toilet Keeps Running Randomly There are a handful of reasons why a toilet keeps running randomly. You can narrow the investigation to a few key parts. All of these parts will be located in the toilet tank. This is the rectangular portion that is closest to the wall and higher than the bowl. Begin by taking the lid off the tank.   Inside the tank are several parts designed to work together. If one of these parts stop working right it may be the reason for the toilet running. Let’s take a look at the different parts of a toilet, and what their functions are. This can help you understand what you are looking for. Toilet Runs Constantly The number one reason why a toilet runs constantly is because the float is set at a higher level than the top of the overflow pipe. This causes the water to spill into the bowl, keeping the water flowing and not shutting off. The fix for this is simple and does not need replacement parts.   The solution to this problem is to adjust the height of the float so that the water level in the tank is below the top of the overflow pipe. The way to do this depends on the style of float your toilet uses. You want the water level to sit ¼ to 1 inch below the top of the overflow pipe.    If it’s a ball float you can adjust the height with your hands. Grip the bar holding the float with both hands and bend the side closer to the float towards the

How To Stop A Toilet From Running Read More »